
 Share
Share
 Print
Print
|
|
|
|
|
P/N N/L/A Installation and Removal
This option can be used to strip and build assemblies in the system. This is normally used in a workshop situation, but can also be used for other purposes such as engine or landing gear assembly.
The top section of this window has three search fields: the N/H/A P/N, S/N and Work Order for the assembly that you are working on. Once entered, select the Find ![]() button to see the current state of the assembly.
button to see the current state of the assembly.

The following information/options are available in this window:
_____________________________________________________________________________________
N/H/A P/N
The Next Higher Assembly requiring an NLA part to be removed/installed.
N/H/A S/N
The Serial Number of the N/H/A requiring an NLA part to be removed/installed.
W/O
The Work Order used to categorize, manage, and schedule work requirements for aircraft maintenance. Work Order that has parts issued to it for installation to the assembly (mandatory).
Robbed Replacement checkbox
Select this checkbox if the NLA to be installed will replace a robbed part in the assembly.
Note: This checkbox is an indicator for financial purposes only.
Transfer ![]() button
button
The Transfer button allows the user to transfer a part from one location to another while the part is still Pending Inventory. For more information refer to Transfer Button, via P/N N/L/A Installation and Removal.
RTS ![]() button
button
The RTS button allows the user to return a part back into inventory and designate its location and serviceability. For more information refer to Return To Stock, via Inventory Transactions.
R/O ![]() button
button
The R/O button allows the user to attach the part to a R/O.
Transfer Arrows
Select the applicable arrow button to manage a P/N N/L/A.
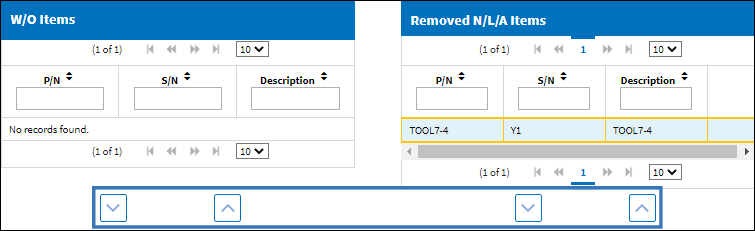
- Transfer from W/O Items to N/L/A Items.
- Transfer from N/L/A Items to W/O Items.
- Transfer from Removed N/L/A Items to N/L/A Items.
- Transfer from N/L/A Items to Removed N/L/A Items.
Select P/N ![]() button
button
Select to install a P/N that has not been Manual Issued to a W/O.
Note: This is the only way to install a Tool using the P/N N/L/A Installation and Removal window.
Note: Switch ![]() NLAINTRMVRB must be set to No.
NLAINTRMVRB must be set to No.
_____________________________________________________________________________________
The window is divided into three different sections: The W/O Items, N/L/A and Removed N/L/A Items section.
The W/O Items section lists all N/L/A parts that have been issued to the W/O. These parts can be installed on the assembly by selecting the "Down" arrow.
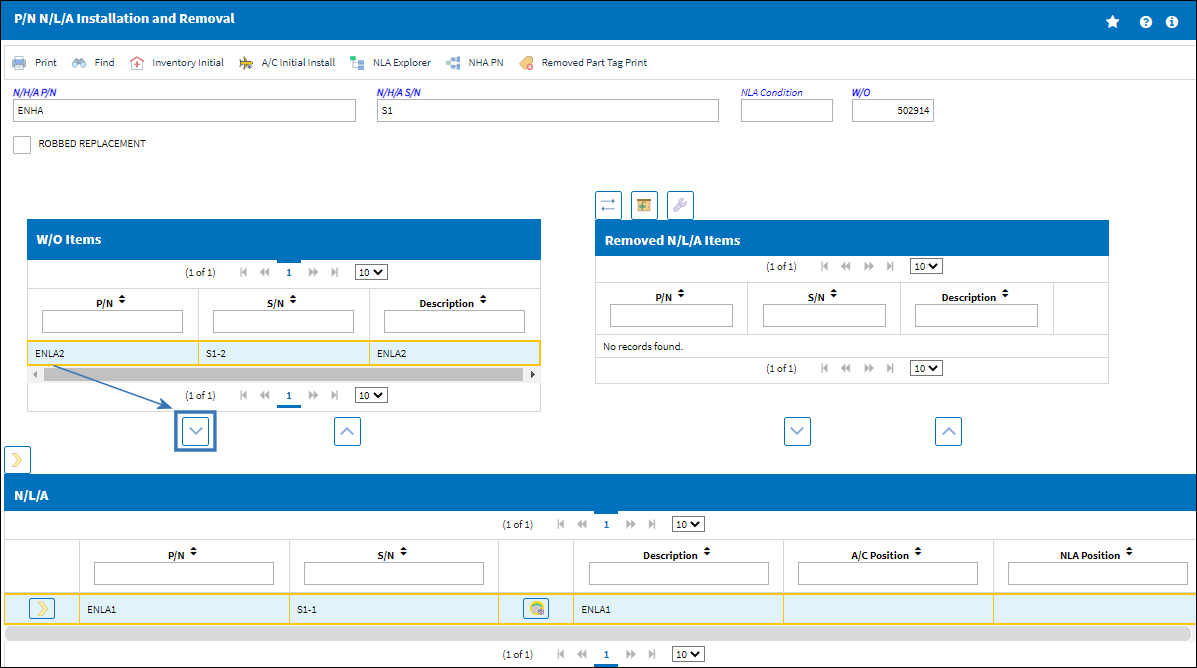
Note: Technical Records Switch ![]() NLAPERF restricts part installations on assemblies based on the N/H/A's setup in the P/N Next Lower Assembly window (accessible from P/N Master). If the N/L/A part being installed has one or multiple designated NLA Position(s), the system will prompt users to enter the NLA Position that the N/L/A should be installed on. For more information, refer to Next Lower Assembly Button, via P/N Master.
NLAPERF restricts part installations on assemblies based on the N/H/A's setup in the P/N Next Lower Assembly window (accessible from P/N Master). If the N/L/A part being installed has one or multiple designated NLA Position(s), the system will prompt users to enter the NLA Position that the N/L/A should be installed on. For more information, refer to Next Lower Assembly Button, via P/N Master.
From here, select the P/N that should be installed.
To remove parts from an assembly, use the arrows to move the relevant part from the N/L/A section to the Removed N/L/A Items section on the right side of the window.
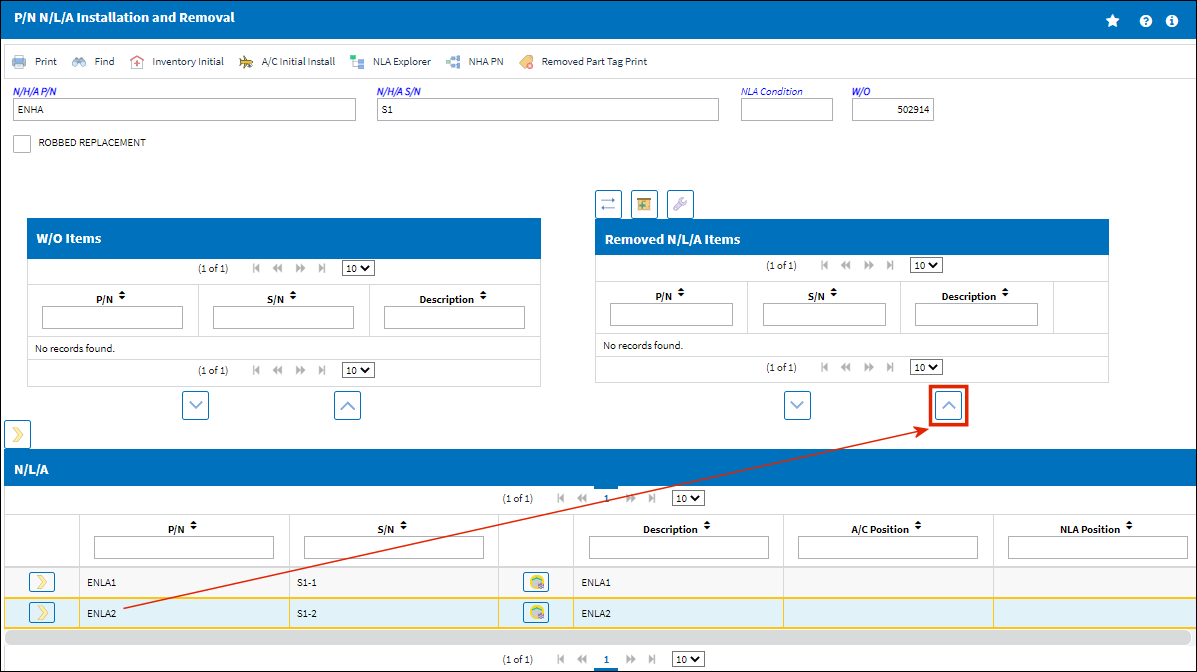
Once the assembly has been built or stripped down, exit to return to the menu. The pending status will be updated on the parts following transaction.
The following buttons are available for additional functionality:
- Print Button
- Inventory Initial Button
- A/C Initial Install Button
- NLA Explorer Button
- NHA PN Button
- Removed Tag Print Button
Share
Print
|
©1997-2024 Trax USA Corp. All rights reserved. This manual may not be copied, photocopied, reproduced, translated, or converted to any electronic or machine-readable form, in whole or in part, without prior written approval from Trax USA Corp. |
|