
 Share
Share
 Print
Print
|
|
|
|
|
Kardex Tray Management
The Kardex Tray Management window is used to design the bin configurations of each tray used by the Kardex VSU (vertical storage unit) system. The Kardex system interfaces with eMRO to automate various materials processes such as Bin Transfers, Transfer Orders, Inventory Counts, and Batch Reservations.
This tray management window is composed of two sections:
- the header window which lists all trays for each location, and
- the detail window which establishes the layout of Bins in each tray.
![]() Note: All Kardex functionality in eMRO is reliant on customer-specific interfaces and third party systems. This functionality is therefore not applicable for most eMRO operators.
Note: All Kardex functionality in eMRO is reliant on customer-specific interfaces and third party systems. This functionality is therefore not applicable for most eMRO operators.
1. Tray List (Header window)
The header window lists all Kardex trays for all Locations in the system.
New trays can be created by selecting the New ![]() button.
button.
To view or update the bin layout for an existing tray, choose the tray then click the Select ![]() button.
button.
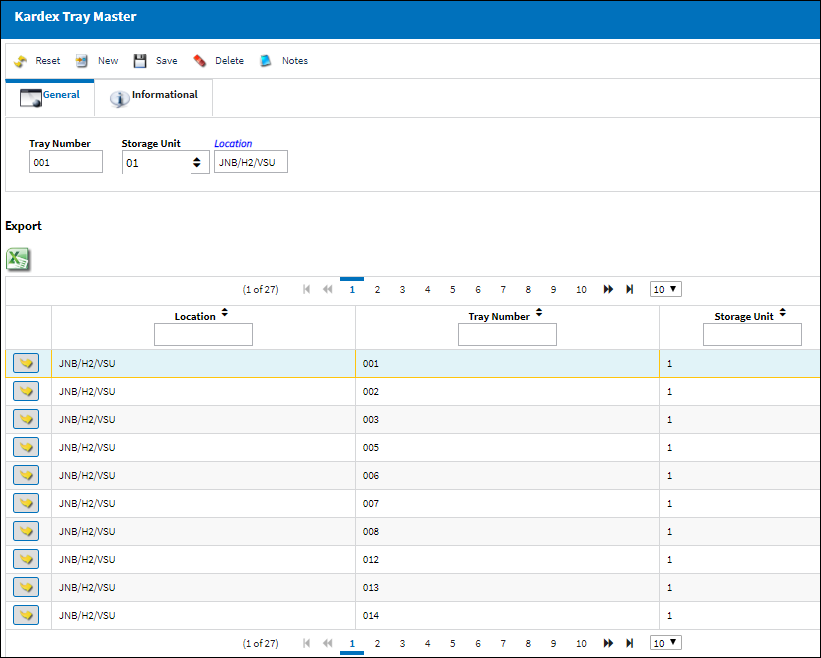
Each tray is categorized with the following information:
_____________________________________________________________________________________
Tray Number
The number of the specific tray. This tray will contains one or more bins (which are configured in the detail window).
Storage Unit
The vertical storage unit (VSU) which house various trays. An inventory Location may contain multiple VSUs.
Location
The location where the VSU is located.
_____________________________________________________________________________________
The Export as Excel ![]() button can be selected to view the queried data (including all pages) in an Excel spreadsheet. This Excel file can be saved for later use. For more information refer to the Export as Excel Button via the eMRO System Standards manual.
button can be selected to view the queried data (including all pages) in an Excel spreadsheet. This Excel file can be saved for later use. For more information refer to the Export as Excel Button via the eMRO System Standards manual.
Click the Select ![]() button to configure the Bins for the specific tray.
button to configure the Bins for the specific tray.
2. Tray Layout (Detail window)
The detail window is used to configure the layout of the Bins on the Tray.
Each Tray (2050mm x 610mm) can have a unique layout of Bins, which can be made up of different sizes.
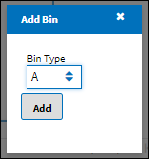
Click the New ![]() button to add a new Bin to the Tray. Select the size of the Bin in the Bin Type field. (Each Bin type is color-coded.)
button to add a new Bin to the Tray. Select the size of the Bin in the Bin Type field. (Each Bin type is color-coded.)
Bin Type |
Dimensions (millimeters) |
Color |
A |
152 x 120 |
|
B |
305 x 241 |
|
C |
305 x 120 |
|
D |
152 x 241 |
|
E |
76 x 241 |
|
F |
76 x 120 |
|
G |
100 x 100 |
|
Note: The Bin Type for Kardex bins are configured through the Bin Category transaction code.
Once the Bin is added to the Tray, the location of the Bin can be moved around on the Tray.
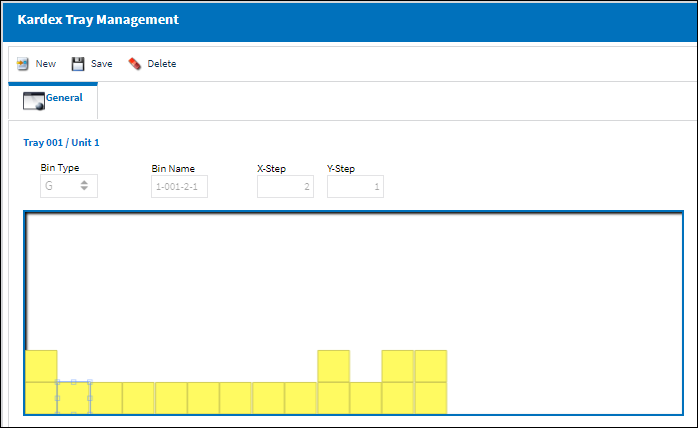
The following information/options are available in this window:
_____________________________________________________________________________________
Tray / Unit
The Tray number and the Kardex unit (VSU) where the tray is located.
Bin Type
This specifies the size of the bin and is color-coded (see above table).
Bin Name
The name of the Bin is automatically generated based on the Tray number, the VSU number, and the Bin's X&Y coordinates on the tray. The format is ' [VSU] - [Tray] - [X-Step] - [Y-Step] '. Example: '1-001-2-1'.
X-Step / Y-Step
This is the coordinates on the Tray where the Bin is located. The 'X' coordinate runs horizontally (increases from left to right), and the 'Y' coordinate runs vertically (increases from bottom to top). Both start at the bottom left corner of the Tray. These fields are automatically populated once a Bin is added to the Tray.
_____________________________________________________________________________________
Note: When a Bin is created from this window, a record for that Bin will automatically be created in the Bin Master window as well.
To delete a Bin from the tray, select the Bin then click the Delete ![]() button.
button.
Note: If the Bin contains parts in it, then the Bin cannot be deleted.
At the bottom of the window, all parts currently in the selected Bin will be displayed.

Share
Print
|
©1997-2024 Trax USA Corp. All rights reserved. This manual may not be copied, photocopied, reproduced, translated, or converted to any electronic or machine-readable form, in whole or in part, without prior written approval from Trax USA Corp. |
|