
 Share
Share
 Print
Print
|
|
|
|
|
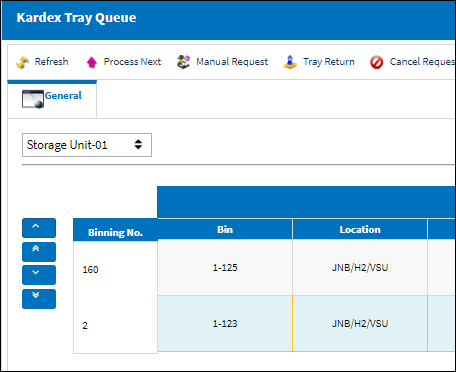
Kardex Tray Queue
The Kardex Tray Queue window allows users to communicate with the Kardex storage units to retrieve trays for required part transactions.
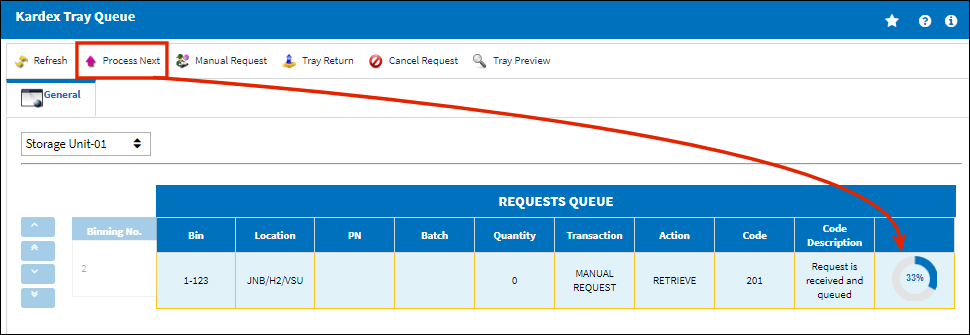
As part transactions are initiated in eMRO (Picklists, Transfer Orders, Bin Transfers, etc.), the transactions are listed in the 'Requests Queue' section at the top of this window.
- From this window the user will retrieve the required tray to access the necessary bin by clicking the Process Next
 button.
 - Then depending on the transaction, the user will either retrieve the part from the bin or store the part in the bin.
- Once ready, the user clicks the Tray Return
 button to send the tray back before processing another transaction from the queue.
 - The processed request will then be removed from the 'Requests Queue' section.
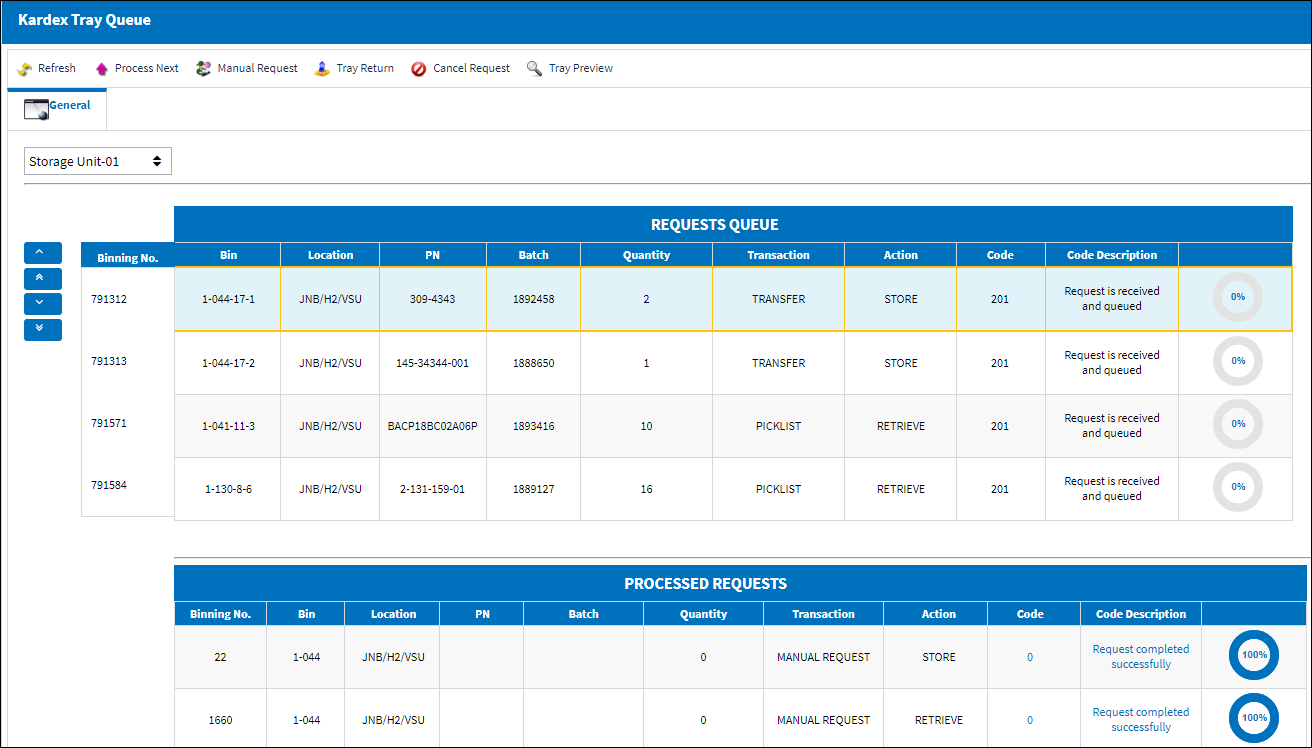
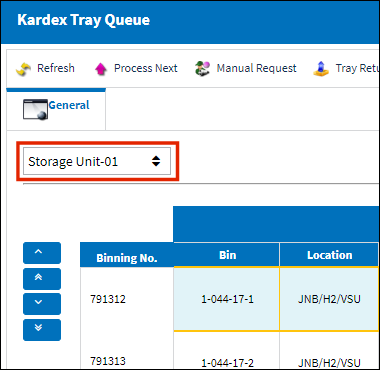
The queue will only show transactions for trays/bins from the selected Kardex 'Storage Unit'.
Applicable Transactions for Kardex
These actions in eMRO will generate a transaction in the queue:
- PICKLIST/CREATE
- BIN/TRANSFER
- TO/CREATE
- ONE/STEP/TRANSFER
- TS/CREATE
This action in eMRO will delete a transaction in the queue:
- PICKLIST/CANCEL
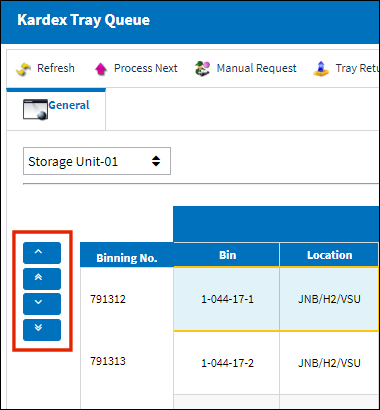
Setting Queue Priorities
The transactions listed in the queue will be based on the Priority of the eMRO transaction. Each Priority transaction code contains a Priority Level. Transactions with high Priority Levels will be prioritized in the queue over transaction with lower Priority Levels.
Regardless of the transaction's Priority, the user can manually adjust the priority of any transaction in the queue by using the Up and Down arrows to the left of the 'Requested Queue' section.
Alternatively, uses can drag and drop an item to change it's priority. To do so, click on the Binning No.
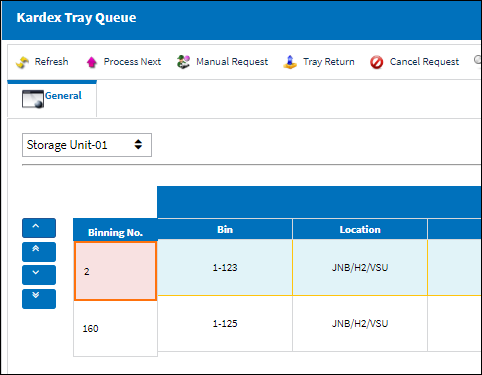
Then drag that item to where it should go in the queue.

Notice that the order of items has been adjusted.
Processing a Transaction
Click the Process Next ![]() button to have the Kardex system delivered the next required tray. Once selected, the progress of the command is shown to the far right of the line item.
button to have the Kardex system delivered the next required tray. Once selected, the progress of the command is shown to the far right of the line item.
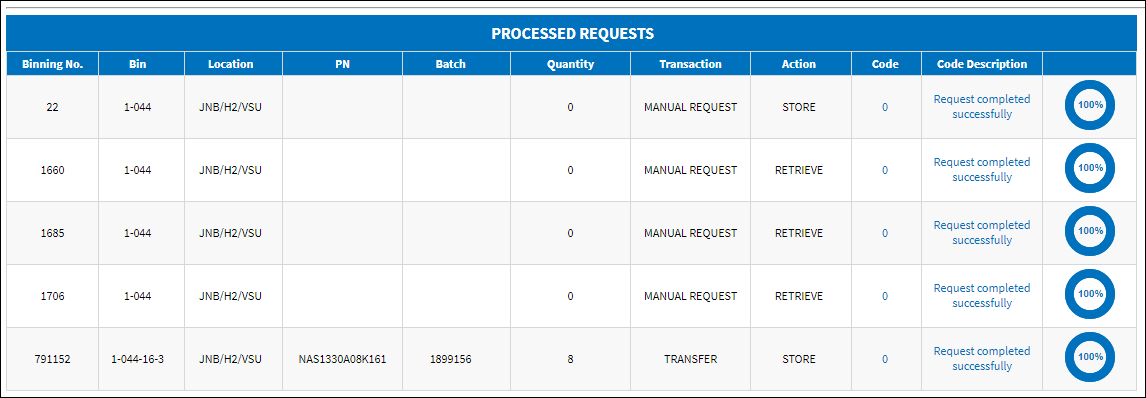
Processed Requests
The the bottom of the window, all transactions that have been processed by the user are listed in the 'Processed Requests' section.
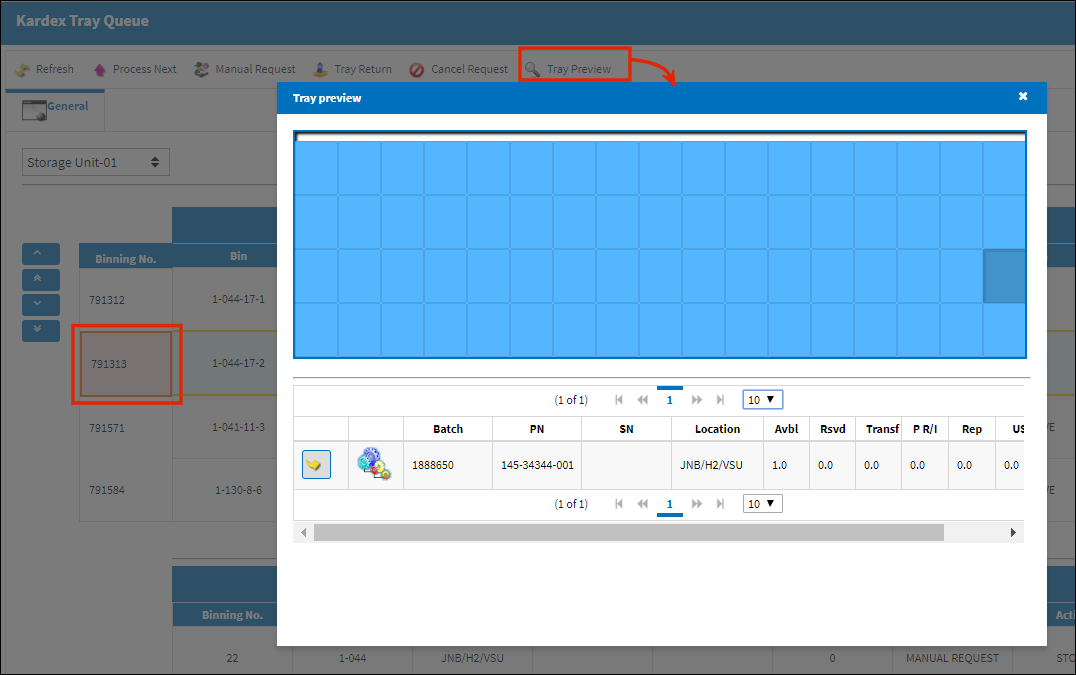
Tray Preview
Click the Tray Preview ![]() button to view the contents of the tray and its bins. Click on a Bin to view the contents of that Bin in the bottom of the pop-up window.
button to view the contents of the tray and its bins. Click on a Bin to view the contents of that Bin in the bottom of the pop-up window.
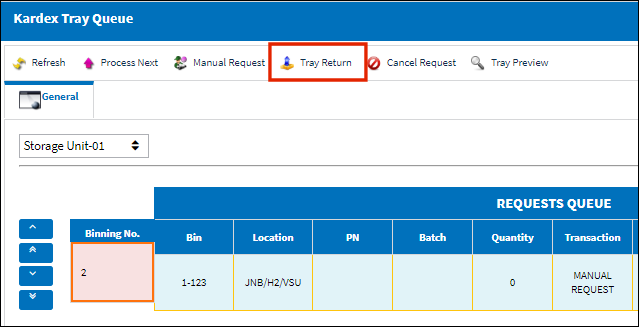
Tray Return
Click the Tray Return ![]() button to send the tray back into its position in the Storage Unit once the transaction has been completed. Once the tray has been returned the next transaction can be processed.
button to send the tray back into its position in the Storage Unit once the transaction has been completed. Once the tray has been returned the next transaction can be processed.
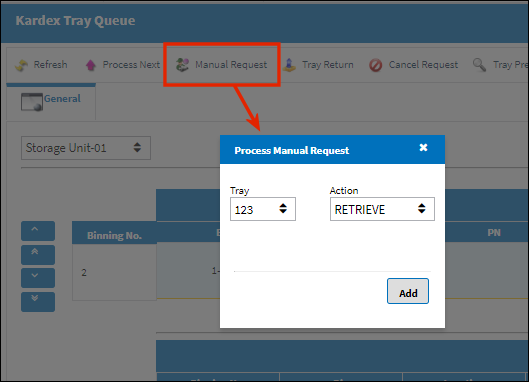
Manual Requests
Click the Manual Request ![]() button to request a specific Tray that may not be listed in the queue. Enter the Tray for that Storage Unit and the Action (Retrieve or Store). Then click the Add button to add the requested tray to the queue.
button to request a specific Tray that may not be listed in the queue. Enter the Tray for that Storage Unit and the Action (Retrieve or Store). Then click the Add button to add the requested tray to the queue.
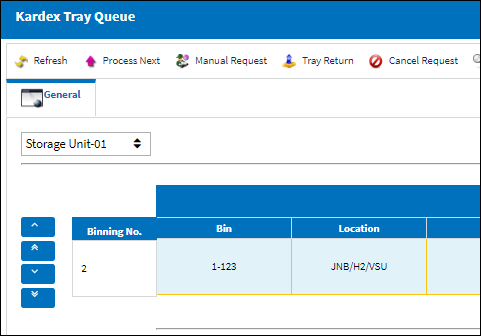
Cancel Request
Click the Cancel Request ![]() button if a request that has already been fulfilled was not cleared from the queue. This option should not be used to cancel a transaction (like a Picklist or T/O).
button if a request that has already been fulfilled was not cleared from the queue. This option should not be used to cancel a transaction (like a Picklist or T/O).
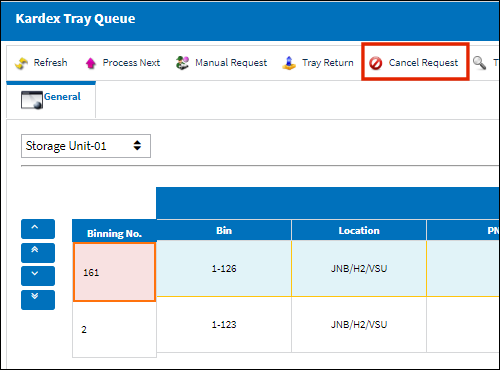
Once the selected item is canceled, it is no longer displayed in the queue.
Share
Print
|
©1997-2024 Trax USA Corp. All rights reserved. This manual may not be copied, photocopied, reproduced, translated, or converted to any electronic or machine-readable form, in whole or in part, without prior written approval from Trax USA Corp. |
|