
 Share
Share
 Print
Print
|
|
|
|
|
Work Pack Print, via Planning Control
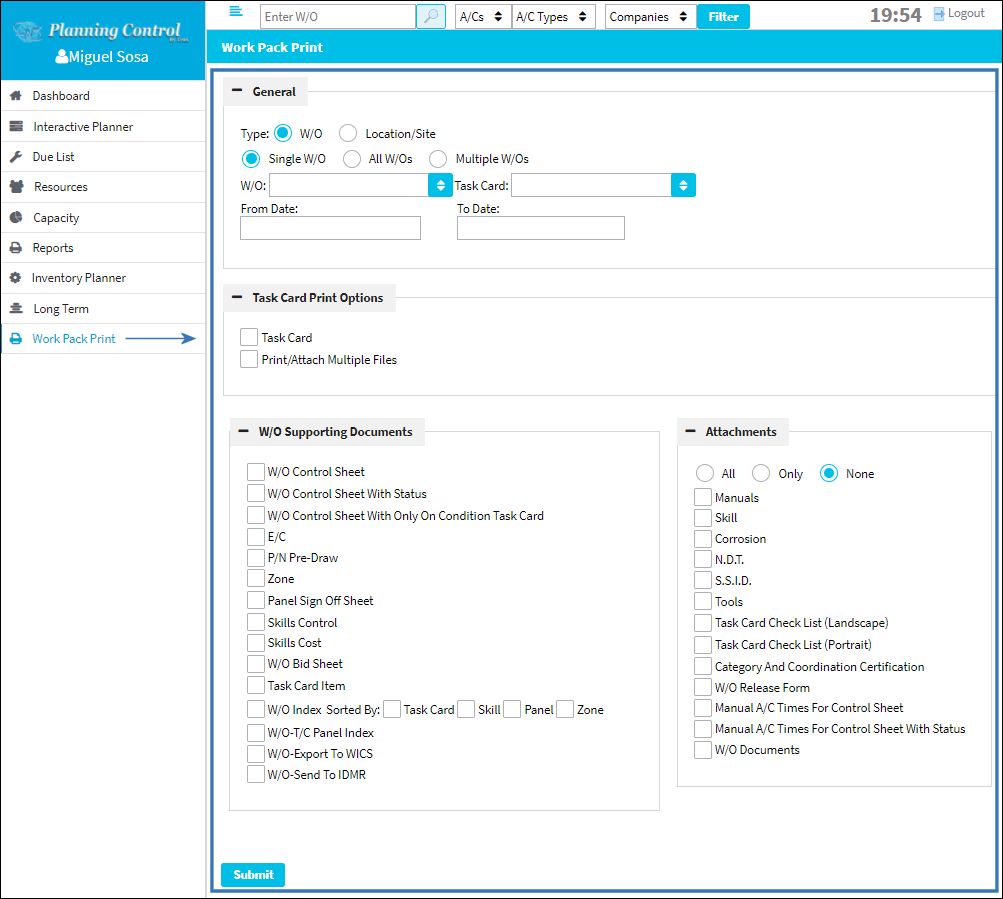
The Work Order Pack Print is used to organize work packages that detail the work required to be performed. The worksite manager can specify the day/shift's work details by a variety of parameters (like by W/O, Task Card, Location, Date, etc.). How the printed selections are organized can then also be customized to fit what is most convenient for a given worksite (like sequence orders and work checklists).
The system displays the the Workpack Print window as follows. Click the Submit button once all applicable options have been selected and the print is ready to be generated.
![]() Note: This window is security-controlled in the Security Explorer via Planning Control/ Update/ Work Pack Print. For more information refer to the Security Explorer, via the System Administration Training Manual.
Note: This window is security-controlled in the Security Explorer via Planning Control/ Update/ Work Pack Print. For more information refer to the Security Explorer, via the System Administration Training Manual.
In the bottom of the window, the Print Jobs section lists all Work Pack Print jobs and their current statuses.

The following information/options are available in this window:
_____________________________________________________________________________________
General section
W/O radio button - Selecting W/O allows users to narrow down the work that needs to be printed by Work Order. This radio button is selected by default. When the W/O radio button is selected, the following options appear:
Single W/O radio button - Select to narrow down the work that needs to be printed to a single Work Order.
All W/Os radio buttons - Select to widen the range of the work that needs to be printed to a all Work Orders.
Multiple W/Os radio button - Select to allow users to include multiple Work Orders in the work that needs to be printed. When the Multiple W/Os radio button is selected, the W/Os drop down will become available.
W/Os drop down - Allows users to select multiple Work Orders from the drop down.
W/O drop down - The Work Order used to categorize, manage, and schedule work requirements for aircraft maintenance.
Task Card drop down - The Task Card / Job Card that details the scheduled maintenance work. If this Task Card is not specified, all of the Task Cards that are associated to the W/O will be printed.
From Date - To Date - Enter a date range in these fields to specify the Work Orders that will be printed.
Location/Site radio button - Selecting this radio allows users to narrow down the work that needs to be printed by Location/Site. When the Location/Site radio button is selected, the following options appear:
Location drop down - The Location for maintenance events, inventory stores, orders, transactions, or training events.
Site drop down - The Site where the work should be carried out (if applicable).
Category drop down - The Work Order Category that will be printed.
W/O Status - Select a W/O Status to print by.
From Date - To Date - Enter a date range in these fields to specify the Work Orders that will be printed.
Task Card Print Options section
Task Card checkbox - Select this checkbox to choose a Work Order Task Card to define the print. When the Task Card checkbox is selected, the following options appear:
Phase drop down- The Phase selection allows only certain Phases of the Work Order Task Cards to be printed (for example, the Pre-dock Task Cards for the check).
Re-Sequence radio button - Select this radio button to add Task Card to sequence and re-sequence the set as necessary.
Add To End - Select this radio button to add the Task Card to the end of existing sequence.
EC drop down - The Engineering Control that specifies aircraft or component scheduled maintenance intervals.
Draft checkbox - Select this checkbox if you want your printouts to be stamped with the word 'DRAFT.' This allows for the printouts to be used strictly for informational purposes.
Note: This is customized functionality that requires a modification to the stylesheet. In order to utilize this 'DRAFT' feature, create a Modification web log with Customer Support.
2nd Copy checkbox - Select to print additional copy.
Document Control Index checkbox- Select this checkbox to include an index of all documents included in the Task Card.
Document Control Index to TXT checkbox - Select this checkbox to include an index of all documents included in the Task Card in a .txt file.
Print/Attach Multiple Files checkbox - Select this checkbox to print each of a Work Order's Task Cards separated into individual PDF files. If sent directly to a printer with a built-in stapler, each file will be collated and stapled/attached together to maximize efficiency.
W/O Supporting Documents section
Select any of the following checkboxes that customize the organization of the print.
W/O Control Sheet checkbox - Includes the W/O Control Sheet which allows managers to verify that all of the work was signed off on.
Note: When the W/O Control Sheet checkbox is selected, the following radio buttons and checkboxes appear:
W/O Control Sheet With Status checkbox - Select to include W/O Control sheet with Status.
Note: When the W/O Control Sheet With Status checkbox is selected, the Sort checkbox appears.
W/O Control Sheet With Only On Condition Task Card checkbox - Select to include W/O Control Sheet With Only On Condition Task Card.
Note: When the W/O Control Sheet With Status checkbox is selected, the Sort checkbox appears.
E/C checkbox - The Engineering Control that specifies aircraft or component scheduled maintenance intervals.
P/N Pre-Draw checkbox - Select to include P/N Pre-Draw.
Zone checkbox - Select to include Zone.
Panel Sign Off Sheet - Organizes all Task Cards for a given Panel. This makes it convenient for a mechanic who is working on a Panel to accomplish all work to be performed for that panel at the same time before the panel is replaced. When the Panel Sign Off Sheet checkbox is selected, the following checkboxes appear:
PNL Inspector Required checkbox - When selected, the workpack print will indicate that a Panel Inspector must inspect the work performed on the panel.
Images checkbox - When selected, an image of the panel will be included in the Workpack as a reference.
Skills Control checkbox - Select to include Skill Control.
Skill Cost checkbox - Select to include Skills Cost.
W/O Bid Sheet checkbox - Select to include W/O Bid Sheet.
Task Card Item - Select to include Task Card Item.
Note: When the Task Card Item checkbox is selected, the Sort checkbox appears.
W/O Index Sorted checkbox - Select to include W/O Index.
W/O-T/C Panel Index checkbox - Select to include W/O-T/C Panel Index.
W/O-Export To WICS checkbox - Select to include W/O-Export To WICS.
W/O-Send To IDMR - Select to include W/O-Send To IDMR.
Attachments section
All radio button- Select to include 'All' attachments
Only radio button - Select to include 'Only' or selected attachments.
None radio button - Select to include no attachments.
Manuals checkbox - Select to include Manuals.
Skill checkbox - Select to include Skill.
Corrosion checkbox - Select to include Corrosion.
N.D.T. checkbox - Select to include N.D.T.
S.S.I.D. checkbox - Select to include S.S.I.D.
Tools checkbox - Select to include Tools.
Task Card Check List (Landscape) checkbox - Select to include Task Card Check List (Landscape).
Task Card Check List (Portrait) checkbox - Select to include a checklist of all Task Cards.
Category and Coordination Certification checkbox - Select to include Category And Coordination Certification.
W/O Release Form checkbox - Select to include the W/O Release Form.
Manual A/C Times For Control Sheet checkbox - Select to include Manual A/C Times for Control Sheet.
Manual A/C Times For Control Sheet With Status checkbox - Select to include Manual A/C Times for Control Sheet with Status.
W/O Documents - Select to include W/O Documents.
Submit button
Select to generate a Work Pack Print Job.
Your Print Jobs section
Select button - Select to view the Work Pack Print.
Download button - Select to download a PDF document of the Work Pack Print.
Delete button - Select to delete the Work Pack Print.
_____________________________________________________________________________________
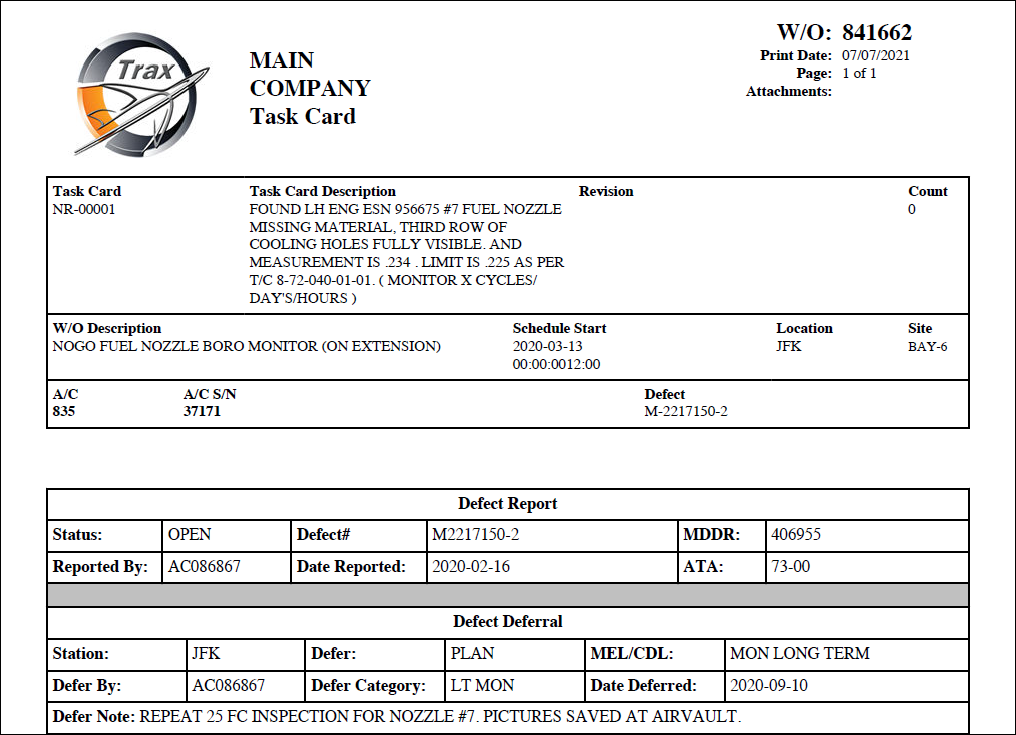
From the Your Print Jobs section select click the Select button or Download button to view the Work Pack Print report.

The Work Pack Print will appear as shown below.
Share
Print
|
©1997-2024 Trax USA Corp. All rights reserved. This manual may not be copied, photocopied, reproduced, translated, or converted to any electronic or machine-readable form, in whole or in part, without prior written approval from Trax USA Corp. |
|