
 Share
Share
 Print
Print
|
|
|
|
|
When a Part Number Date Control is created for a part, the Date Control is inserted when receiving a part into inventory. For parts that are already in inventory or installed before the P/N Control is created, the Date Control must be added to the control manually via the P/N Control Authorization window.
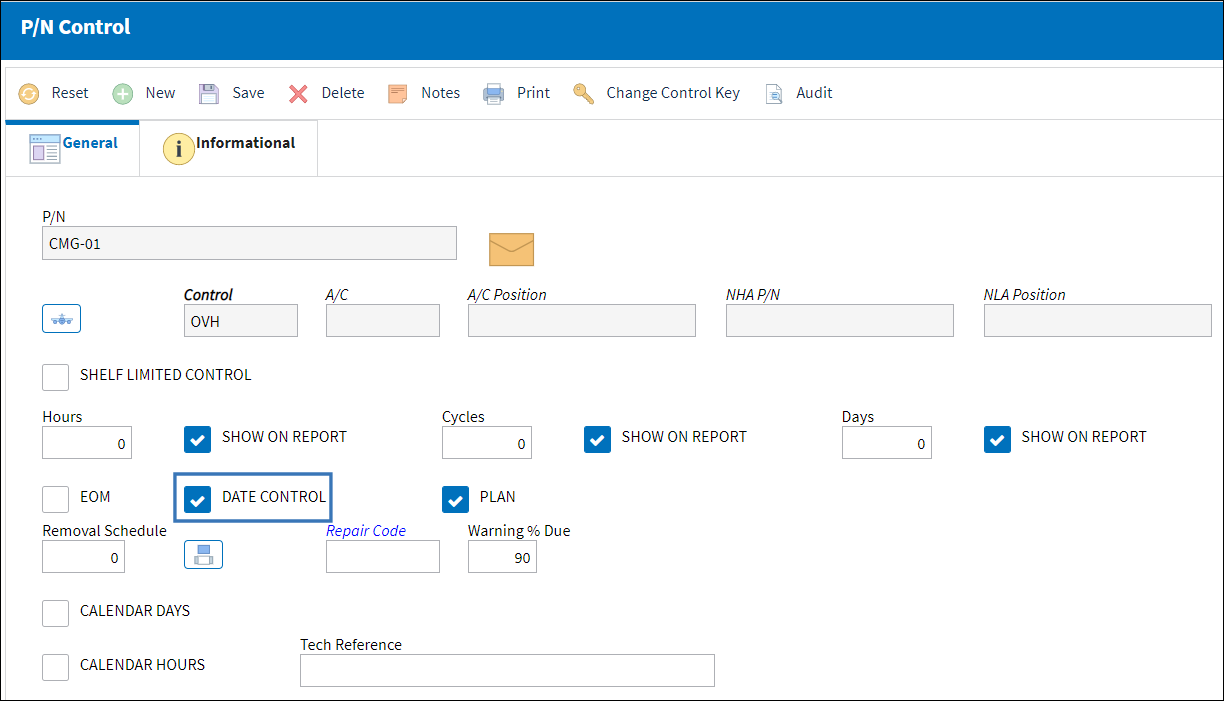
For example, create a P/N Control and select the Date Control checkbox.
Enter the Date Control through the P/N Inventory Control window when receiving the part into inventory.
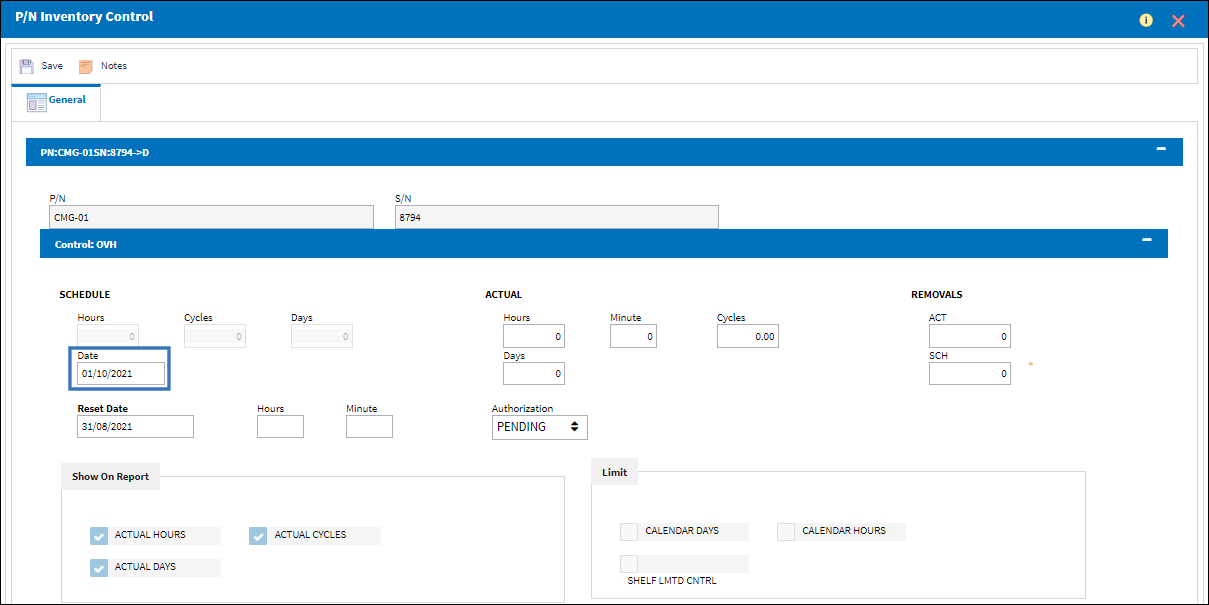
Note: The P/N Control Reset Date is irrelevant when there is a Date Control.
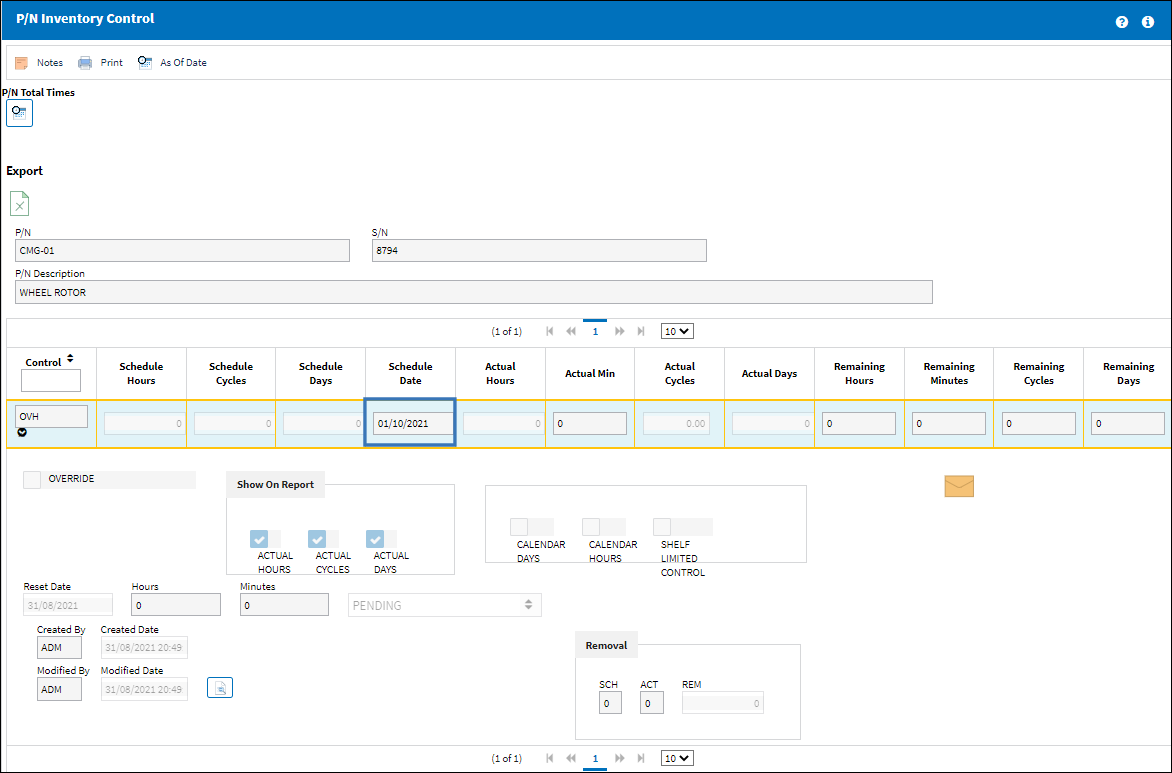
From the Inventory Detail window for the new P/N S/N, select the P/N Control ![]() button and notice the Date Control.
button and notice the Date Control.
This functionality does not apply to parts that were received into inventory or installed before the P/N Control was created for the part. For these parts, the Date Control must be added manually through the P/N Control Authorization window.
For example, from the Inventory Detail window for a previously inventoried P/N S/N, select the P/N Control ![]() button and notice that the Date Control has not been applied.
button and notice that the Date Control has not been applied.

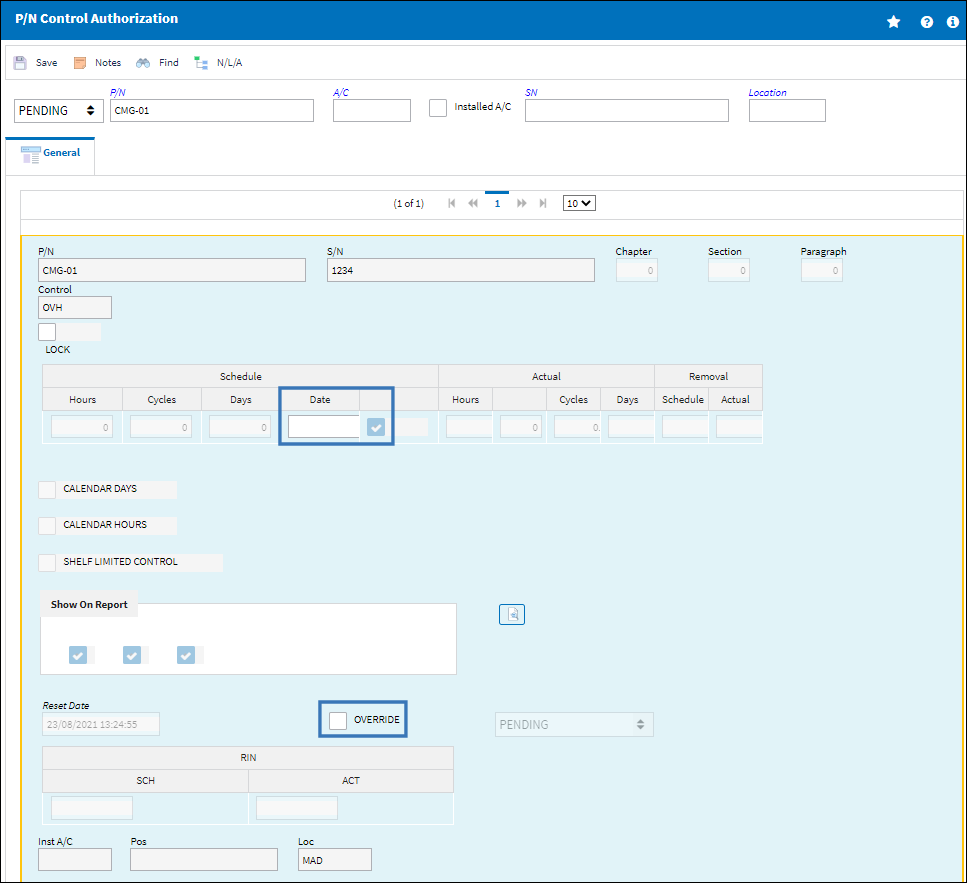
To update the Date Control for this specific P/N S/N, open the Technical Records/Update/P/N Control Authorization window and edit the Date Control accordingly. The Control checkbox to the right of the Date field must be selected to edit the Date Control.
For more information refer to the P/N Control Authorization via the Technical Records Training Manual.
Note: In order to access the Date Control field, users must have security access to the P/N Control Edit Schedule via Technical Records/Update/P/N Control Authorization of the Security Explorer.
Once the Control Date is entered, users can view the updated P/N Date Control for the P/N S/N through the Inventory Detail, P/N Control ![]() button window.
button window.

Share
Print
|
©1997-2024 Trax USA Corp. All rights reserved. This manual may not be copied, photocopied, reproduced, translated, or converted to any electronic or machine-readable form, in whole or in part, without prior written approval from Trax USA Corp. |
|