
 Share
Share
 Print
Print
|
|
|
|
|

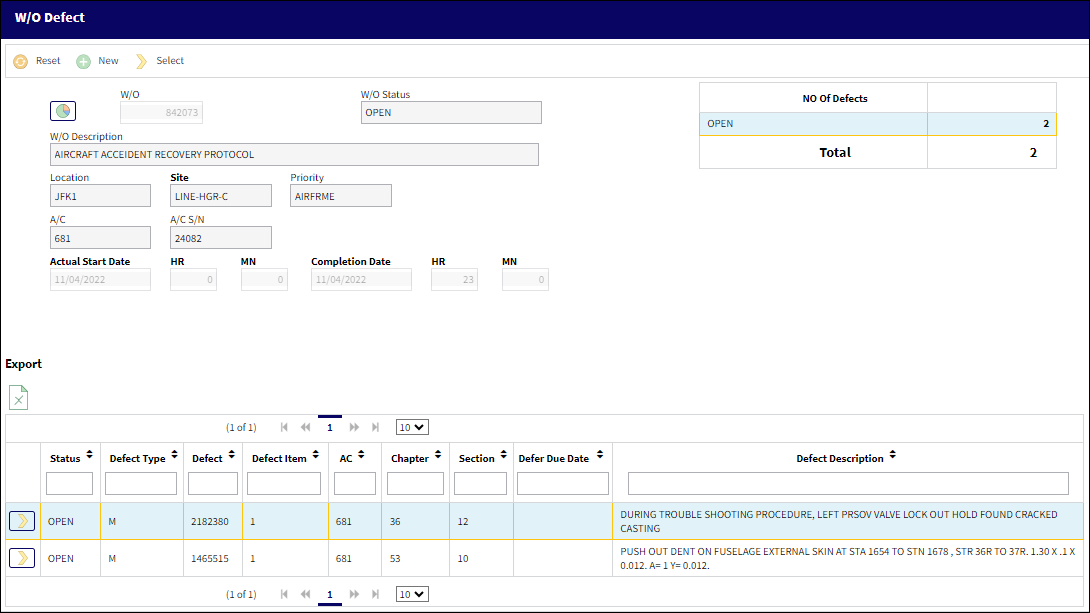
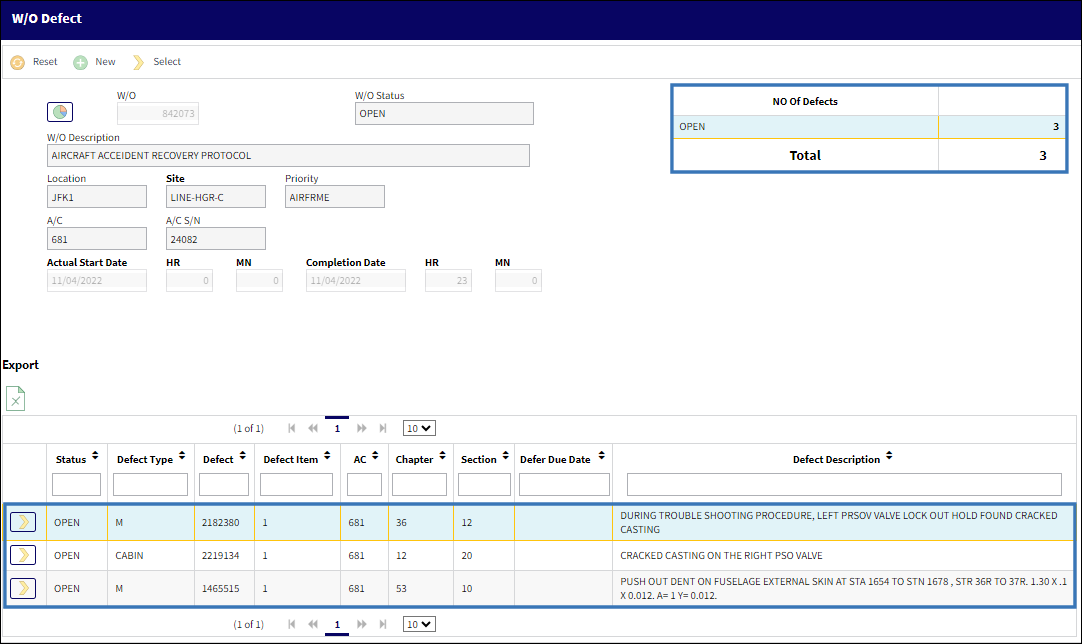
The Defect ![]() button opens the W/O Defect window, which allows users to create, view, and edit Defects associated with the current W/O.
button opens the W/O Defect window, which allows users to create, view, and edit Defects associated with the current W/O.
Note: This button is only available if switch ![]() TCDEFINFO is set to Yes. For more information, refer to Task Control Switches.
TCDEFINFO is set to Yes. For more information, refer to Task Control Switches.
The following information/options are available in this window:
_____________________________________________________________________________________
W/O Information
W/O - The Work Order used to categorize, manage, and schedule work requirements for aircraft maintenance.
W/O Status - The current status of the W/O.
W/O Description -
Location - The Location for maintenance events, inventory stores, orders, transactions, or training events.
Site - The Site where the work should be carried out (if applicable).
Priority - The priority of the Work Order (e.g., Urgent).
A/C - The individual aircraft tail number.
A/C S/N - The Aircraft's Serial Number which is provided by the manufacturer. This serial number is like a registration number, but it is not dependent on a country code and therefore never changes.
Actual Start Date/HR/MN - The date and time work on the W/O started.
Completion Date/HR/MN - The Date and time the work order is being set to a Post Completed or Closed status.
Defect Information
Select ![]() button - This button is used to select the desired record.
button - This button is used to select the desired record.
Status - The current status of the Defect.
Defect Type - The type of defect found on the aircraft (for example, Pilot Report, MX Report).
Defect - The defect number (or log book number).
Defect Item - The defect log item number.
A/C - The individual aircraft tail number.
Chapter - The ATA Chapter classification associated to the Defect Report. The chapters which appear for selection are those ATA Chapters which are flagged for Defect in the ATA Master. This Chapter/Section must have Alert levels set up in order for Recurrent Items to be created via the Reliability module.
Section - The ATA Section classification associated of the Defect.
Defer Due Date - The date and time the deferment must be resolved by.
Defect Description - The description of the defect which describes the problem found or notes the service being performed.
_____________________________________________________________________________________
Creating a Defect via the Defect Button Window
To create a new defect, select the New ![]() button.
button.
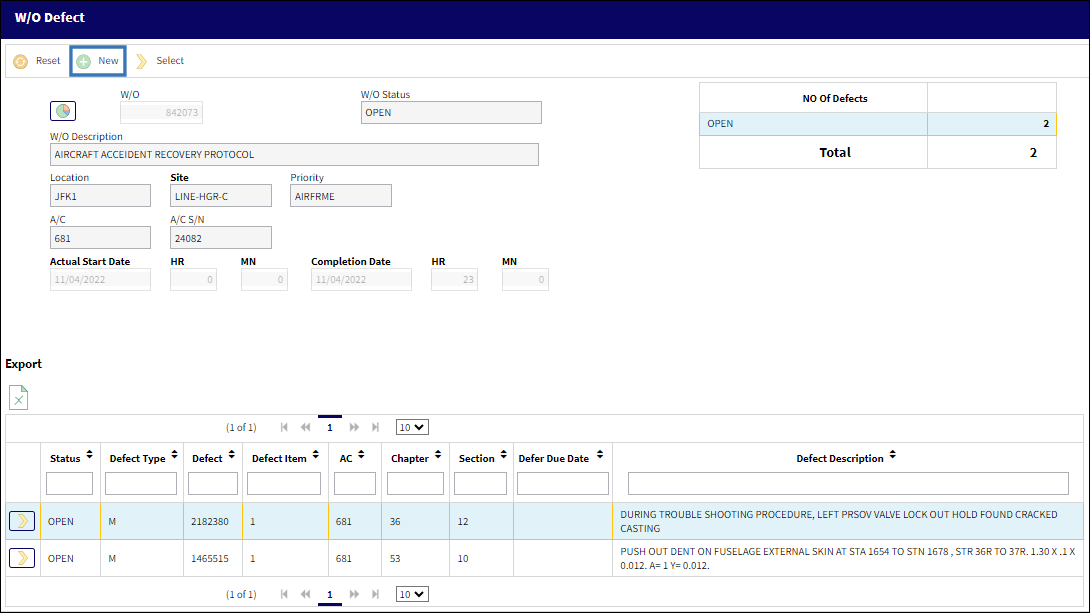
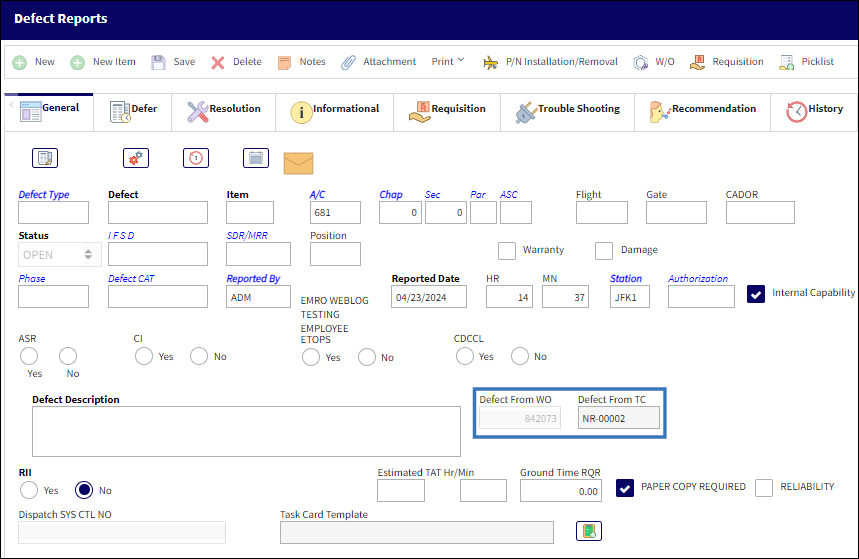
Upon selection, the task card selection pop up is displayed. In this pop up, the user must select the task card that the defect will be applied to.

After selecting the task card, the Defect Report detail window is displayed. This window functions similarly to the Defect Report Detail window via the Technical Records module. The only difference is the implementation of the Defect from W/O and Defect from T/C fields. For more information, refer to Defect Report Detail, General Tab.
Populate the appropriate fields and select the save button.
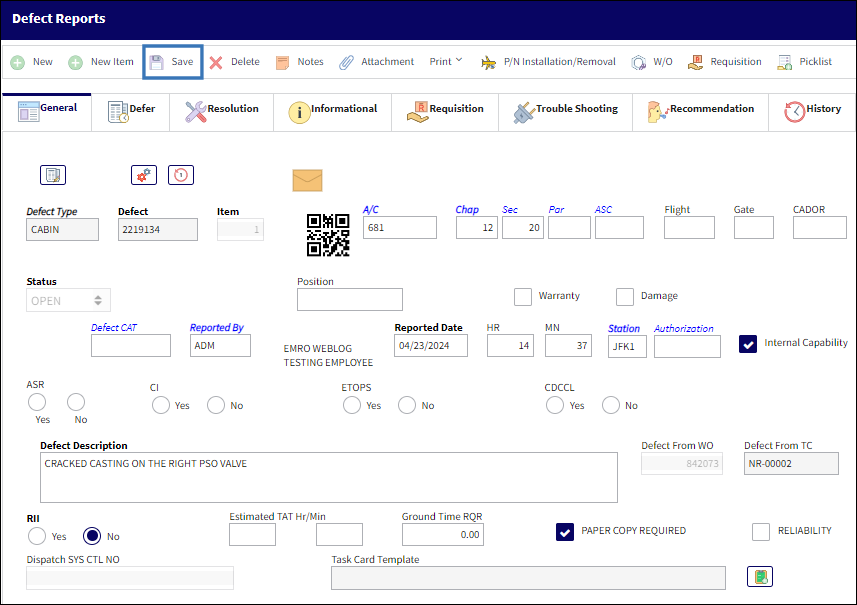
The defect has now been added to the W/O and the number of defects have increased.
Share
Print
|
©1997-2024 Trax USA Corp. All rights reserved. This manual may not be copied, photocopied, reproduced, translated, or converted to any electronic or machine-readable form, in whole or in part, without prior written approval from Trax USA Corp. |
|