
 Share
Share
 Print
Print
|
|
|
|
|
Order Type: X/O & E/X

Using the 'X/O & E/X' and 'X/O & EX FULFILL' Order Type options, the Company Change transaction will change a P/N's company ownership as a result of an exchange agreement. Users need to initially perform a X/O & E/X Company Change transaction to have the system auto-generate the X/O and E/X. Then, the two orders can be fulfilled using the X/O & E/X FULFILL company change transaction. Both orders can be invoiced accordingly.


Setup:
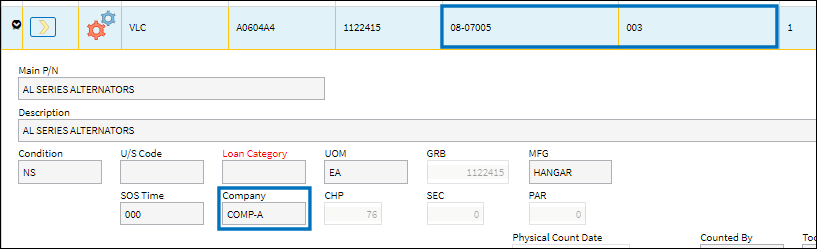
In this example, the following P/N (S/N 003) initially belongs to company A (COMP-A).
Another component (S/N 004) belonging to company B (COMP-B) is also available in Inventory.
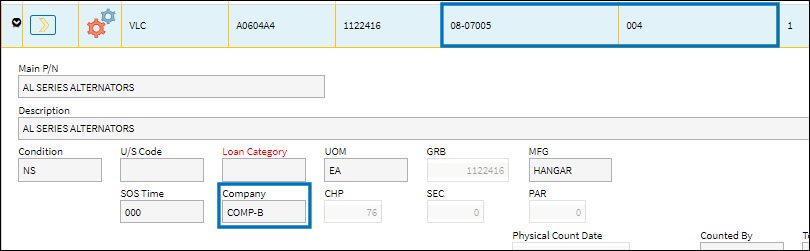
Note that both companies have specified a customer inside their respective Company Profiles.
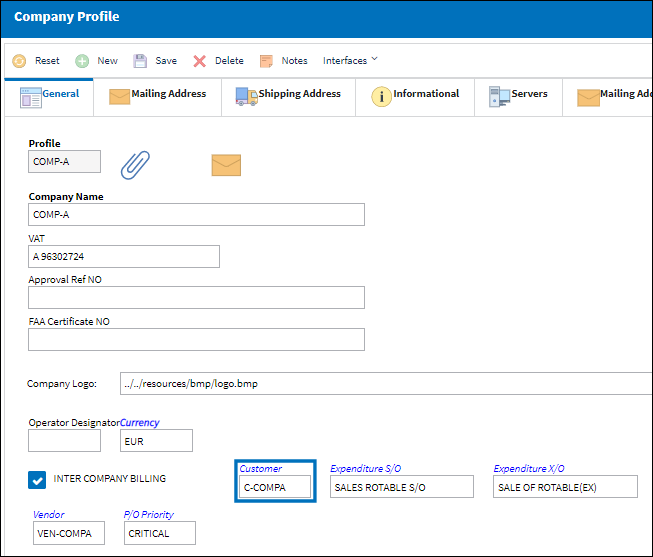
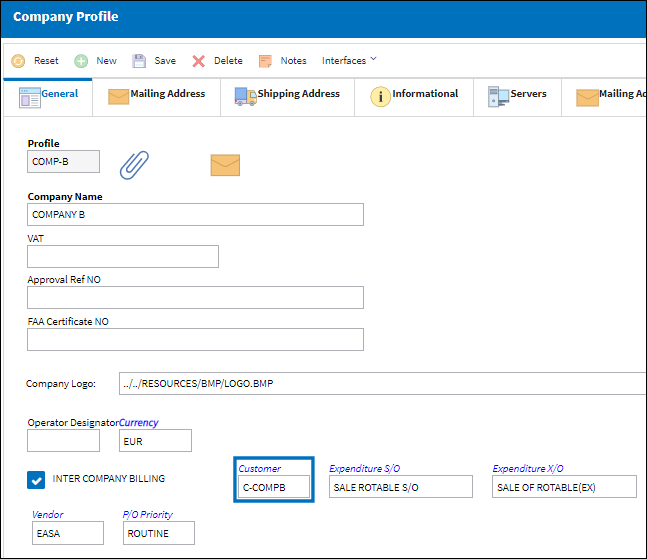
Note: The customer field is only available when the Inter Company Billing checkbox is selected. For more information, please refer to Company Profile, General Tab.
Example 1: X/O & E/X Company Change
S/N 003 is set to change its company ownership from COMP-A to COMP-B through an X/O & E/X transaction. A 20.00 exchange fee has been specified inside the Exchange Fee field, and the 'New' Transfer option is selected to create a new Transfer Order alongside the X/O and E/X.
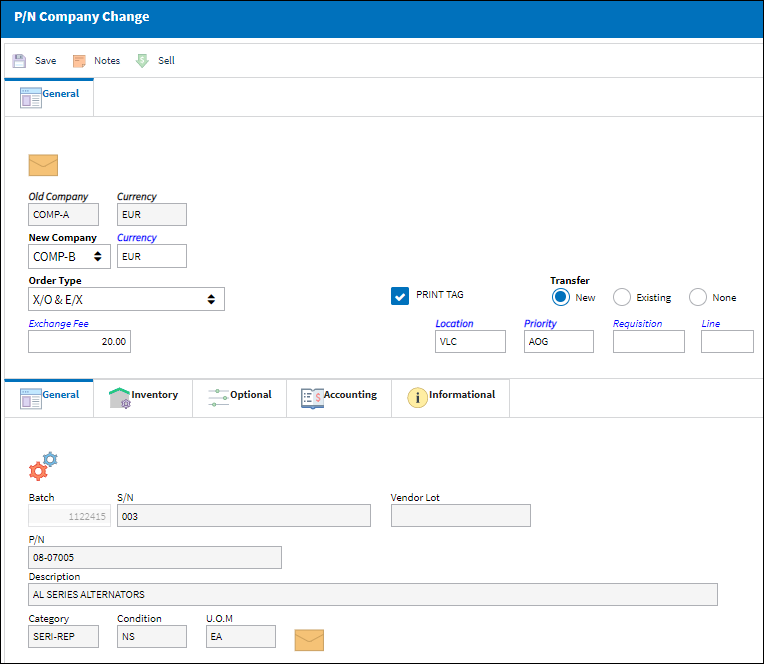
Note: The 'Existing' Transfer option should not be selected for the X/O & E/X Company Change transaction.
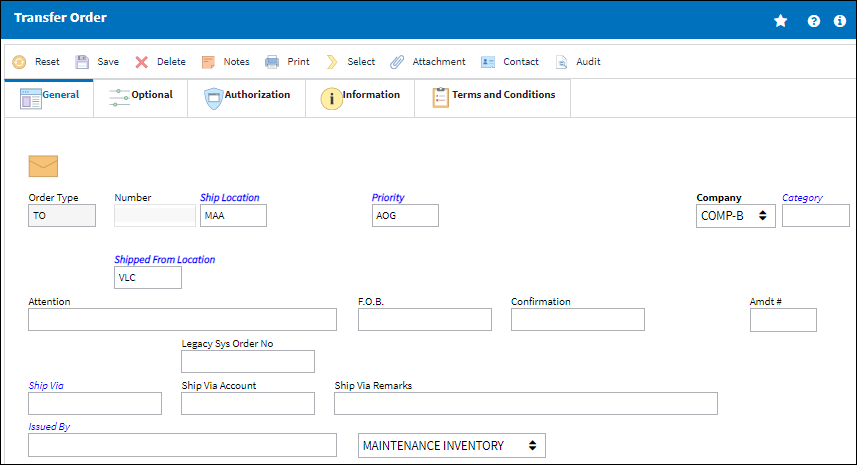
Once saved, the T/O Header window will be displayed automatically.
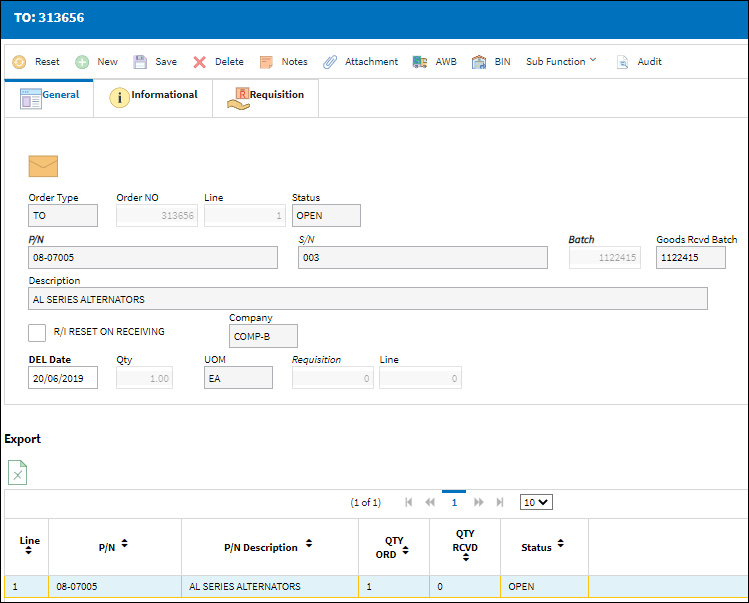
Once all required information is entered in the T/O Header and is saved, the T/O Detail will be displayed. Once saved, the P/N is added as a line item to the T/O.
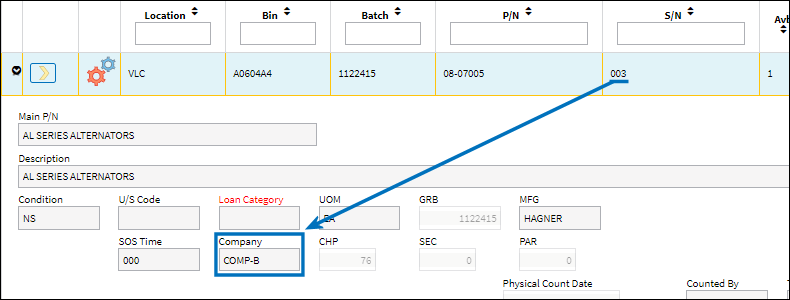
The P/N's company ownership is set to COMP-B.
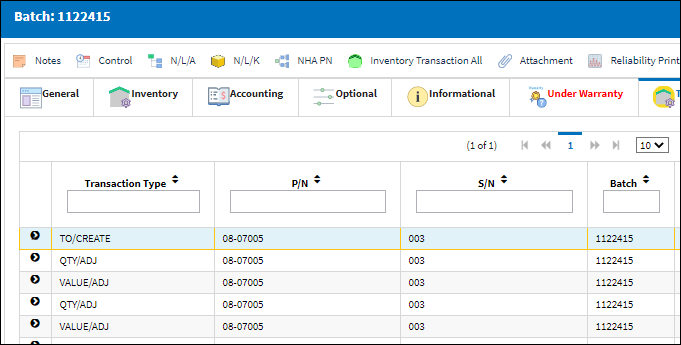
Both QTY/ADJ and VALUE/ADJ records have been added to the transaction history of the batch. A TO/CREATE record has also added in this example.
Both QTY/ADJ and VALUE/ADJ records are linked to the auto-generated E/X and X/O. Note that both orders have the same order number.
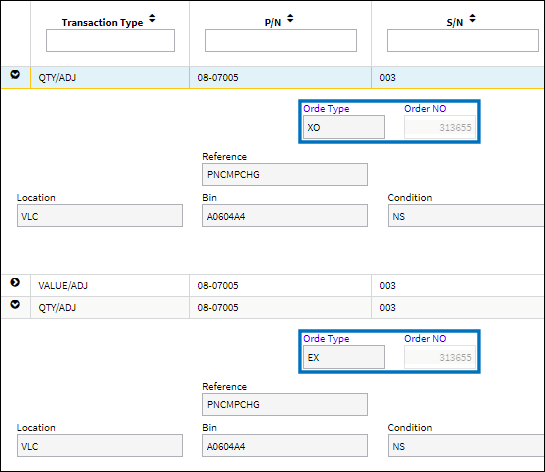
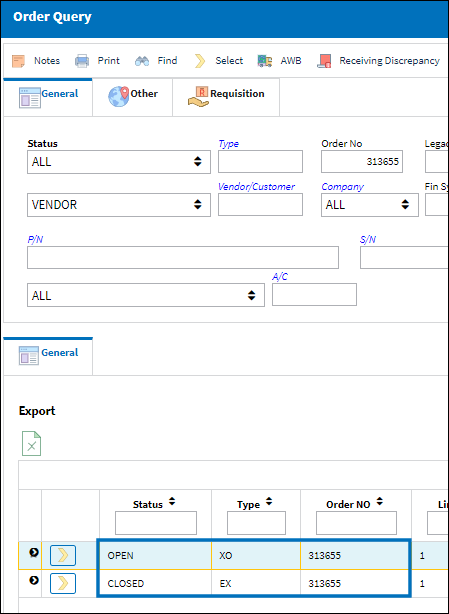
While the E/X was automatically generated in CLOSED status, the X/O will remain OPEN until a part is selected for exchange. In the following section, S/N 004 will be used in a X/O & E/X FULFILL Company Change transaction in order to fulfill the orders.
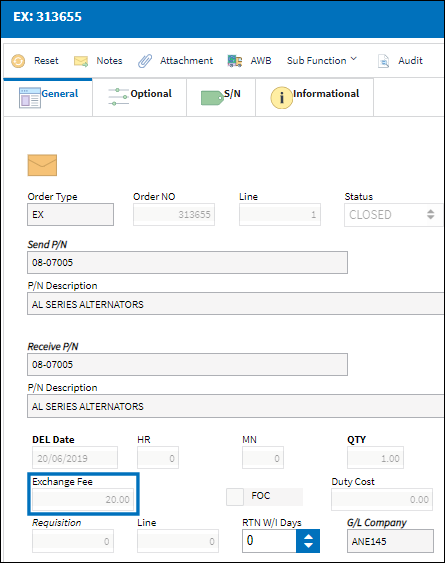
The exchange fee that was specified earlier has been applied to both the auto-generated E/X and X/O.
![]() Note: The Fixed Assets for the two parts are not swapped between the companies until after the X/O & E/X Fulfill step (next).
Note: The Fixed Assets for the two parts are not swapped between the companies until after the X/O & E/X Fulfill step (next).
Example 2: X/O & E/X FULFILL Company Change
S/N 004 is set to change its company ownership from COMP-B to COMP-A through a X/O & E/X FULFILL transaction. This transaction will fulfill the X/O that was created through the X/O & E/X Company Change transaction in the previous section. The unfulfilled order is entered in the Order No field, and the 'New' Transfer option is selected to create a new Transfer Order.
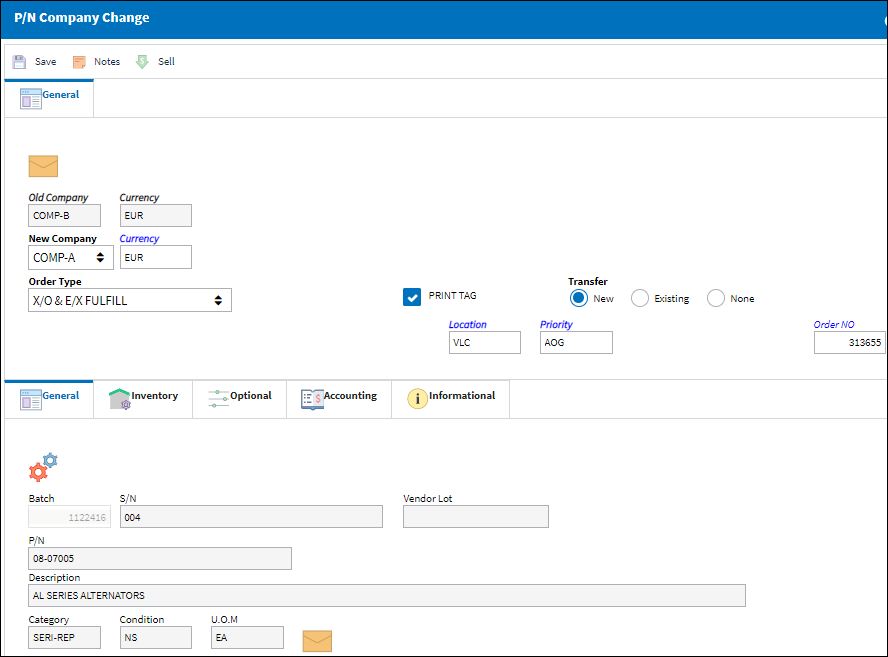
Note: The 'Existing' Transfer option should not be selected for the X/O & E/X FULFILL Company Change transaction.
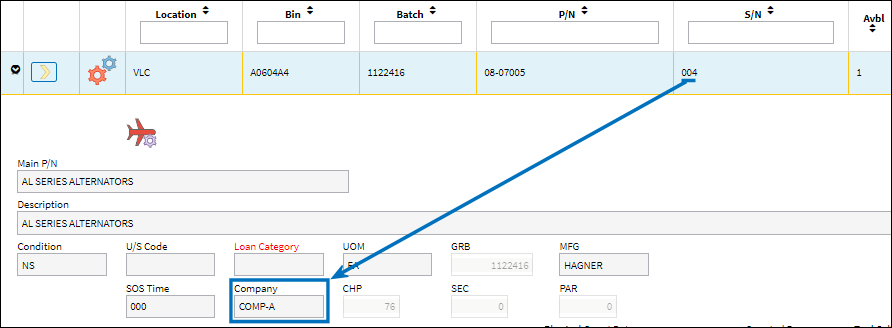
The system will display the T/O Header and, once saved, the T/O Detail window. After the T/O has been set up and the transaction is performed, S/N 004's company ownership is set to COMP-A.
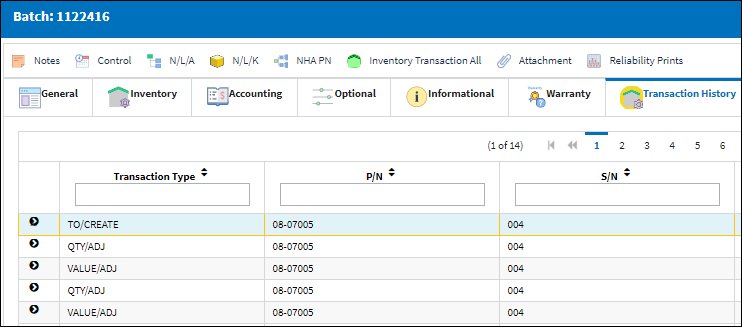
Both QTY/ADJ and VALUE/ADJ records have been added to the transaction history of the batch and are linked to the E/X and X/O specified earlier. A T/O CREATION record has also been added to the Transaction History.
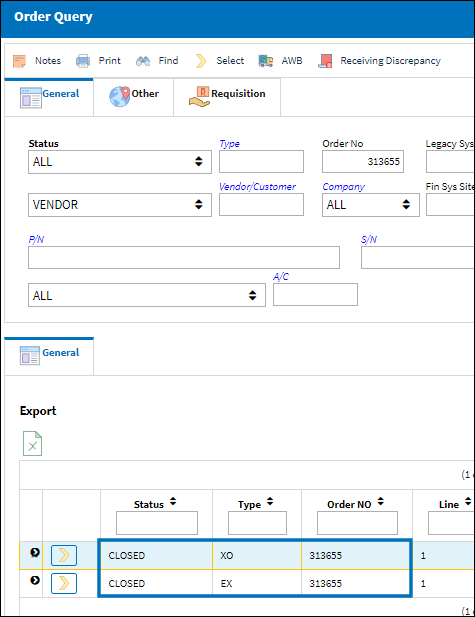
The associated X/O and E/X have both been set to CLOSED status as they have both been fulfilled.
Example 3: Invoicing the X/O & E/X
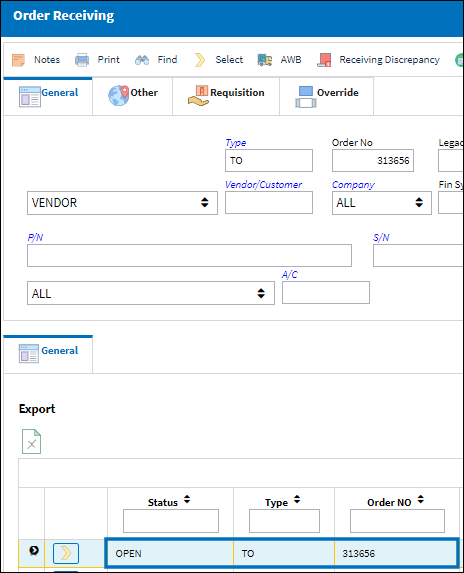
Before being able to invoice the auto-generated X/O and E/X, the relevant T/Os created during the Company Change transaction have to be received by the associated company. In this example, the T/O created in the first example is received.
Note: If the 'None' Transfer option had been selected during the X/O & E/X Company Change transaction, users could proceed to the next step immediately.
The relevant X/O is then finalized through the Exchange Order Out Finalization window. Note that the Invoice checkbox is selected in the Exchange Order Out Finalization Detail's General tab to prompt the creation of the invoice.

Once the Exchange Order Out Finalization record is saved, the invoice will become available in the Customer Invoice Authorization window under the customer's name. After selecting the Post and Close Invoice ![]() button, the invoice will be sent to the Print Queue.
button, the invoice will be sent to the Print Queue.
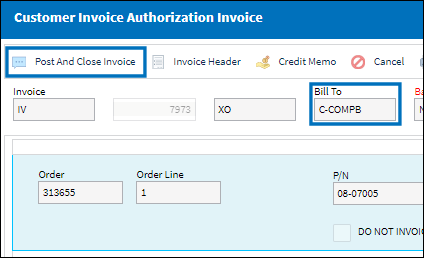
The Exchange Order Out is invoiced through the Customer Invoice Authorization Explorer, while the Exchange Order would be invoiced through the Link module.
Note: If Customer Orders Switch ![]() XOINVAUTH is set to No, the invoice for the X/O will automatically be authorized. For more information on how to invoice an X/O, please refer to Exchange Order Out Process.
XOINVAUTH is set to No, the invoice for the X/O will automatically be authorized. For more information on how to invoice an X/O, please refer to Exchange Order Out Process.
![]() Note: The Fixed Assets for the two parts are swapped between the companies after the X/O & E/X Fulfill step is complete.
Note: The Fixed Assets for the two parts are swapped between the companies after the X/O & E/X Fulfill step is complete.
Share
Print
|
©1997-2024 Trax USA Corp. All rights reserved. This manual may not be copied, photocopied, reproduced, translated, or converted to any electronic or machine-readable form, in whole or in part, without prior written approval from Trax USA Corp. |
|