
 Share
Share
 Print
Print
|
|
|
|
|
Work Area, via Dent Mapping
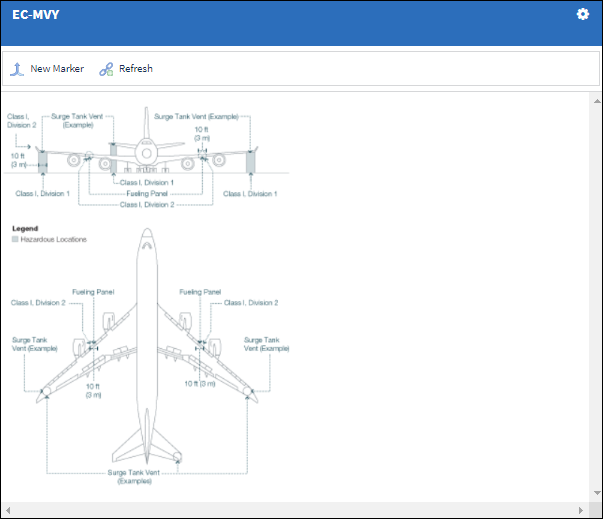
The Work Area allows the user to review and edit existing dent marking details and create new dent markings.
Select the Show Markers ![]() button at the top of the Dent Mapping window and existing dent markings will appear.
button at the top of the Dent Mapping window and existing dent markings will appear.
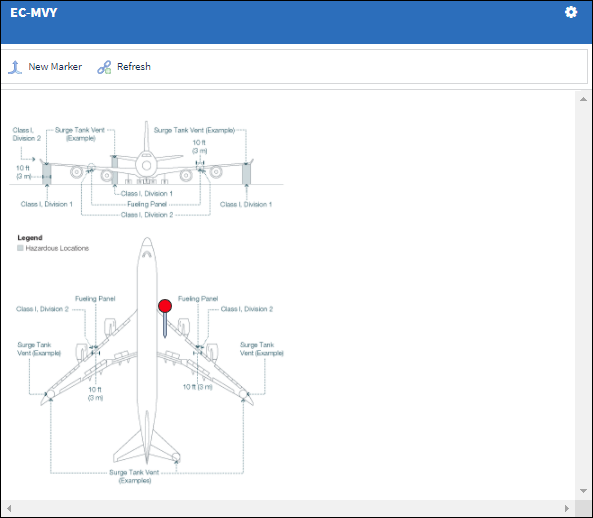
The following dent mark indicators are displayed in the window:
_____________________________________________________________________________________
Red Dent ![]() Marker
Marker
When a dent marker appears in red, this indicates that a dent has been associated to the form.
Blue Dent ![]() Marker
Marker
When a dent marker appears in blue, this indicates that there is an existing Damage Report associated to the dent.
Yellow Dent ![]() Marker
Marker
When a dent marker appears in yellow, this indicates that a specific dent has been selected.
_____________________________________________________________________________________
Add a new dent marking
To create a new dent marking, select the New Marker![]() button and the aircraft defects appear in the work area below the image.
button and the aircraft defects appear in the work area below the image.
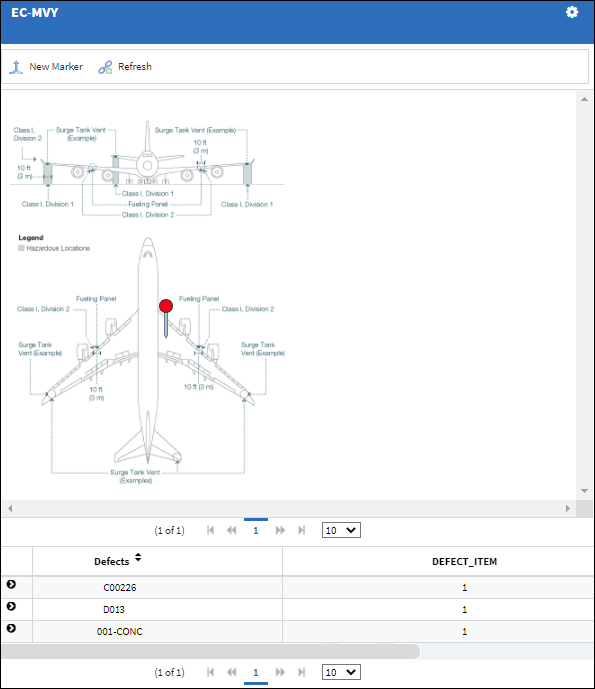
Select and highlight the defect the marking is being created for and then click on an area of the image that the marking is being associated with. The new dent marking appears.
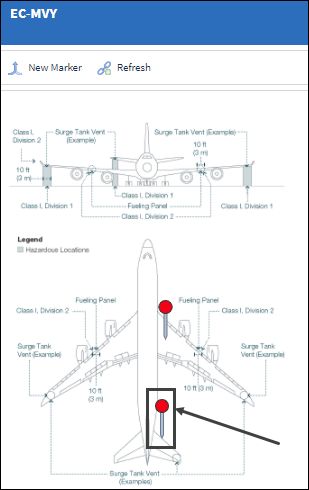
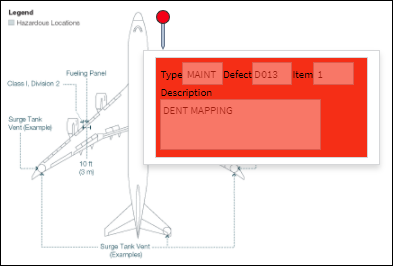
Hover over a dent marker to view the associated defect's information.
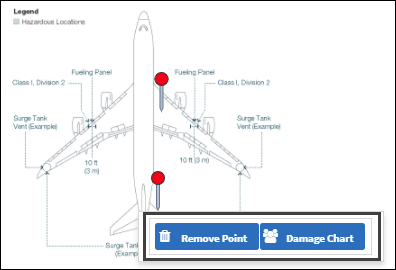
Select on the dent marker and 2 buttons appear, Remove Point and Damage Chart. Select the Remove Point button to remove the dent marker from the image. Select the Damage Chart button to create a Damage Chart and enter the dent details. For more information, refer to Damage Chart, via Dent Mapping.
Options button
Click the Options ![]() button to view the following options:
button to view the following options:
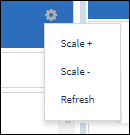
Scale+ - Select to zoom into the image.
Scale- - Select to zoom out of the image.
Refresh - Select to refresh the window.
Share
Print
|
©1997-2024 Trax USA Corp. All rights reserved. This manual may not be copied, photocopied, reproduced, translated, or converted to any electronic or machine-readable form, in whole or in part, without prior written approval from Trax USA Corp. |
|