
 Share
Share
 Print
Print
|
|
|
|
|
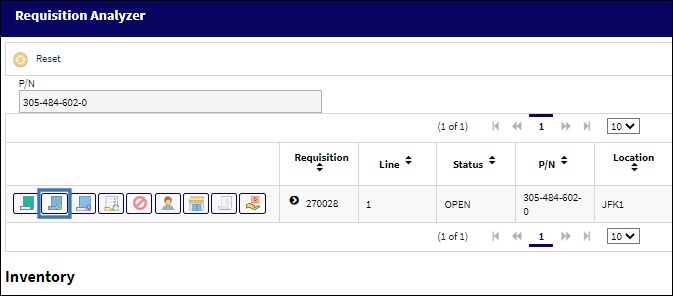
The Purchase Order ![]() button is used to create a PO from the Requisition Analyzer window.
button is used to create a PO from the Requisition Analyzer window.
From the Requisition Analyzer window, select a requisition and a vendor and select the Purchase Order ![]() button.
button.
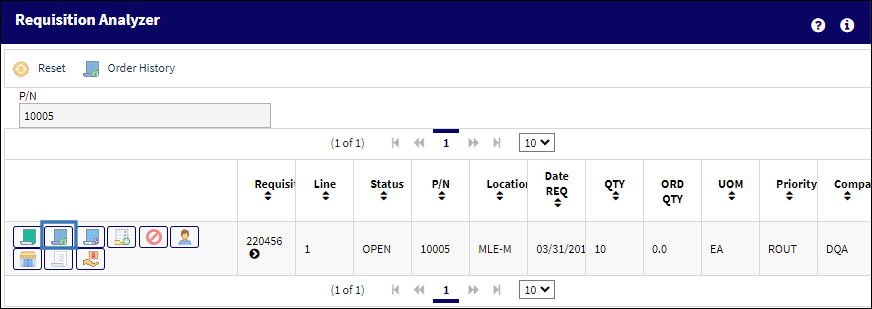
The Save Prompt is displayed. Select 'OK.'
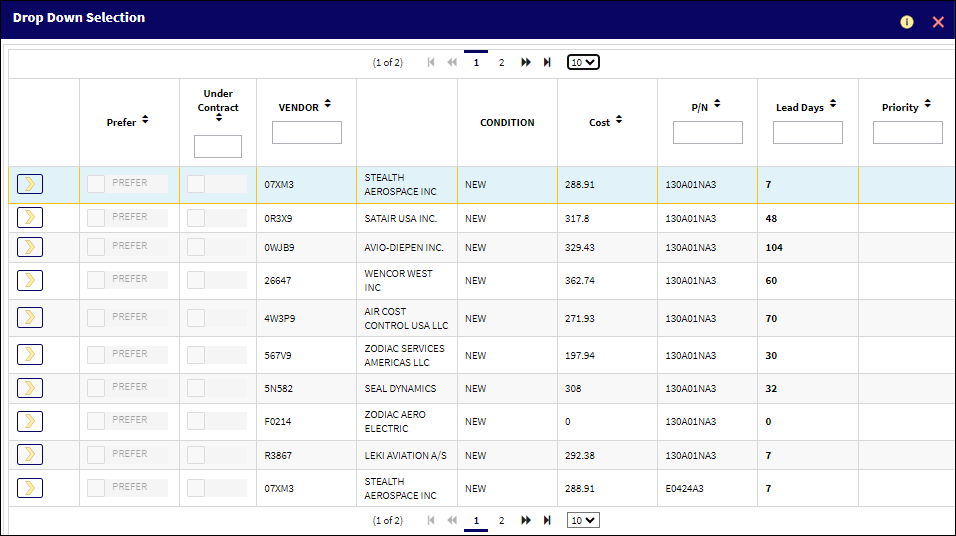
A pop-up window is displayed. Populate all mandatory and desired information in the pop-up and select the Save ![]() button.
button.

The following information/options are available in this window:
_____________________________________________________________________________________
Priority
The priority placed on the transaction (e.g., routine, AOG, etc.). For additional information and functionality, refer to the Priority transaction code via the Orders Transaction Codes.
Delivery Date
The number of lead days to be included in the delivery date. This number of days is added to the Order creation date to calculate the delivery date or date of expected delivery.
Terms
The terms of payment, including the amount of days in which the payment must be made, may be defined by selecting from the pre-defined listing established in the System Transaction Codes. Terms may be changed for a particular order as required. For additional information, please refer to the Terms section of the System Trans Codes Training Manual.
Company
The company the order is being created for. The user may update/change the Company specified in the Requisition Header in this field. Once the PO is created, it will reflect the new Company.
Note: For more information, refer to the Multi Company Functionality.
_____________________________________________________________________________________
The system displays the Purchase Order detail pop-up window, as shown below:
The Purchase Order Detail, Optional Tab contains the following radio buttons which allow the user designate if the requisition is to be an auto issue, auto reserve, or none:
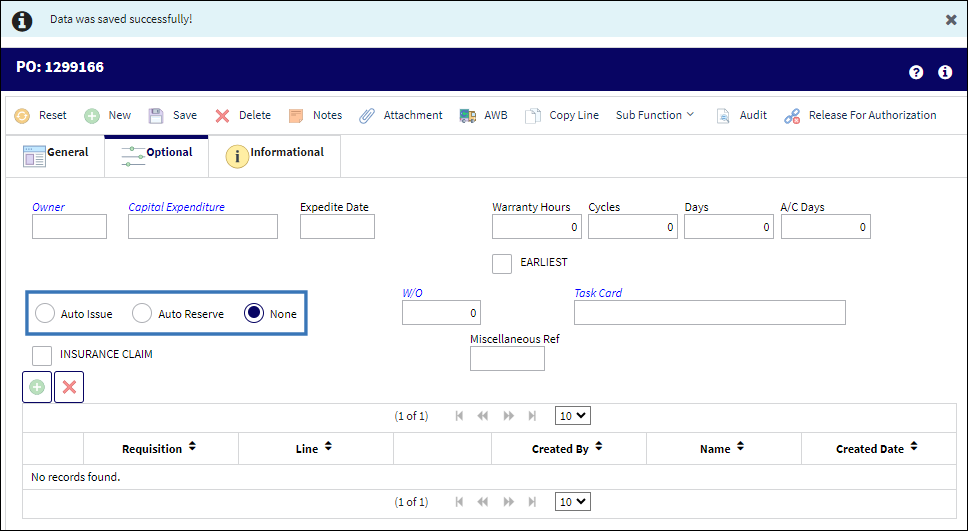
The following information/options are available in this window:
_____________________________________________________________________________________
Auto Issue
Check this box to automatically issue the associated part to the order. If checked, the W/O field will be mandatory. Upon completion of Order Receiving or Receiving Inspection (if applicable), the system will auto generate a Manual Issue print and the part will be issued from inventory and expensed to Work Order. The Auto Issue allows for the inventory binning step to bypassed and the immediate issue to occur. Typically this is used with any AOG situations and any aircraft undergoing heavy maintenance checks which will require a lot of ground time (especially useful if the aircraft is location at a vendor for maintenance).
Auto Reserve
Will automatically generate a pick list for the indicated W/O which will reserve the part upon receiving, via Order Receiving or Receiving Inspection as defined per the R/I Required flag against the part.
None
Is selected by default, allows for the placing of the part in inventory upon the completion of the required receiving processes.
_____________________________________________________________________________________
Note: For complete information on Purchase Orders, please refer to the Orders Training Manual. Additionally, information can be included/edited through the Notes ![]() and Purchase Order Header
and Purchase Order Header ![]() buttons.
buttons.
After all fields are completed, click on the Save ![]() button to complete the transaction.
button to complete the transaction.
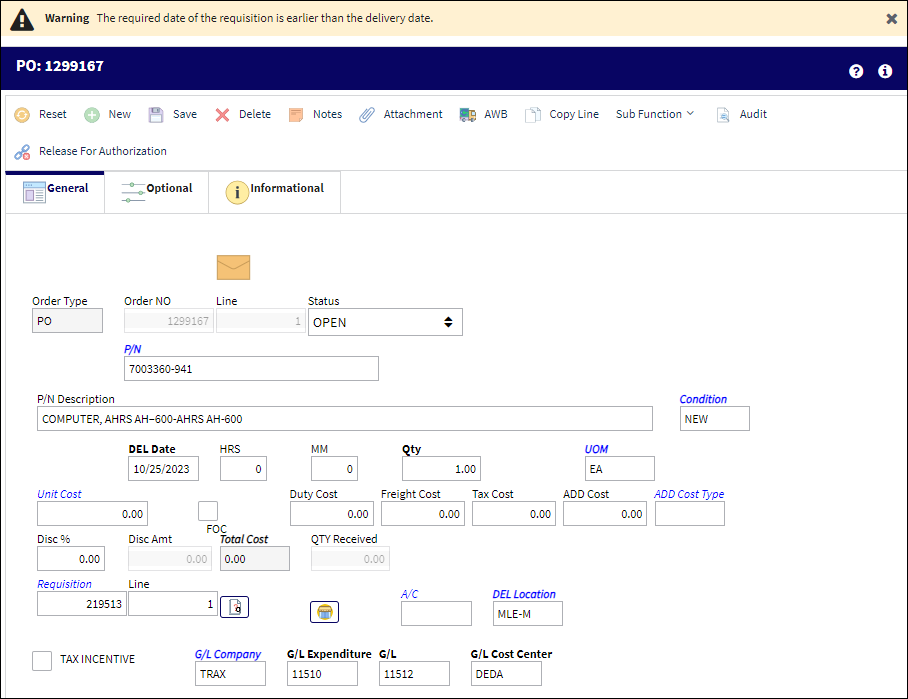
If for some reason the PO is void (empty) or not saved, the user may receive the following warning. Select ‘Yes’ to leave the Requisition Open or select ‘No’ to place the Requisition in Ordered status.
If the required date is earlier than the delivery date, the following error will appear:
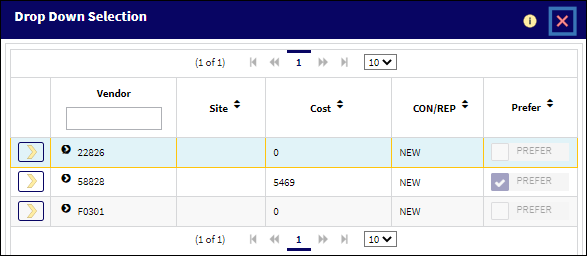
Purchase Order Creation with Non-Preferred Vendors ![]()
Users can create Purchase Orders without the need for preferred vendors. Select the Purchase Order button within the Requisition Analyzer window.
Instead of selecting a preferred vendor, select the exit button.
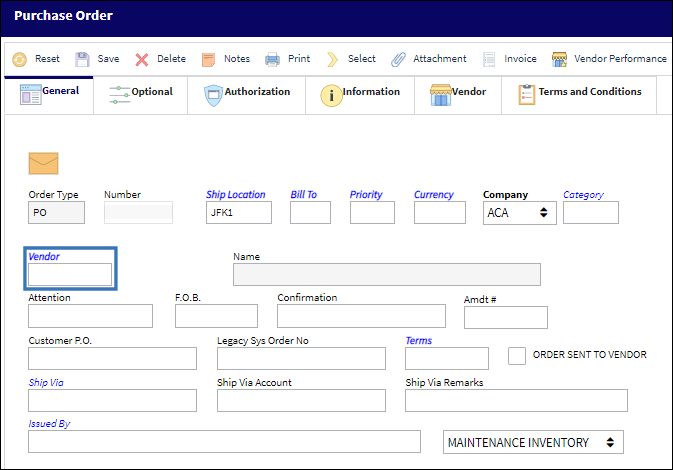
A Purchase Order header with a blank Vendor field displays. Users then enter the appropriate information alongside the vendor of their choice. Saving the Purchase Order Header will display the Purchase Order Detail and Requisition.
The following tab and buttons offer additional functionality:
Share
Print
|
©1997-2024 Trax USA Corp. All rights reserved. This manual may not be copied, photocopied, reproduced, translated, or converted to any electronic or machine-readable form, in whole or in part, without prior written approval from Trax USA Corp. |
|