
 Share
Share
 Print
Print
|
|
|
|
|
The Attachment ![]() button is a standard button found throughout the system and is used to attach images, documents, web links, and Trax Doc references to a record. Enter the full path (network or other) that contains the image the user would like to associate with the record.
button is a standard button found throughout the system and is used to attach images, documents, web links, and Trax Doc references to a record. Enter the full path (network or other) that contains the image the user would like to associate with the record.
From the Attachment Control, select the Add ![]() button or Drag and Drop
button or Drag and Drop ![]() the file onto the window.
the file onto the window.
Attachments can only be in the following formats: .JPG, .TIFF, .BMP, .PNG, Adobe® Portable File Document (.PDF) format, Microsoft® Word (.DOC), Microsoft® Excel (.XLS), HTML (HTML, HTM), Audio (Wave, MP3, WMA), Video (MPEG, MPG), and Cmg (CMG).
After selecting the appropriate file, save it within the Attachment Control window through the Save ![]() button and close the window. Then, save the record for which the Attachment is associated to in the record's window, also through the Save
button and close the window. Then, save the record for which the Attachment is associated to in the record's window, also through the Save ![]() button.
button.
![]() The Attachment Control window also allows videos attached via eMobility to be viewed and downloaded.
The Attachment Control window also allows videos attached via eMobility to be viewed and downloaded.
The Attachment ![]() button is a standard button found throughout the system. For more information, refer to the Attachment button, via the System Standards Training Manual.
button is a standard button found throughout the system. For more information, refer to the Attachment button, via the System Standards Training Manual.
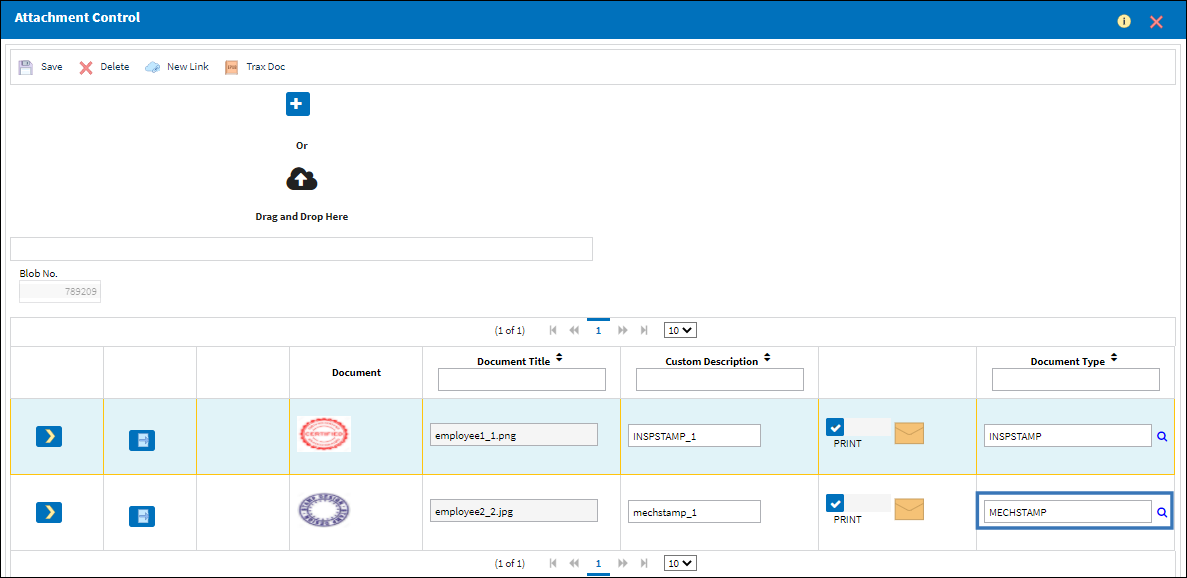
Mechanic and Inspector Stamps ![]()
Users can upload a custom Mechanic and Inspector Stamp that will appear via the Prints window for a Task Card Print.
Note: For this functionality to be in effect the customer will need to request the default Stylesheet from eMRO customer support. In addition, if the customer has a custom Stylesheet they will need to reach out to eMRO customer support to make the necessary adjustments to the applicable Stylesheet. For more information on how to import a Stylesheet, refer to Main Stylesheet, via Company Profile in the Settings Training Manual.
![]() Note: The images configured with the "MECHSTAMP" and "INSPSTAMP" transaction code respectively, will be used in the TaskControl app as the applicable employee's Mech/Insp Stamp. For more information, refer to the Task Card Tab, via TaskControl Detail in the TaskControl Training Manual.
Note: The images configured with the "MECHSTAMP" and "INSPSTAMP" transaction code respectively, will be used in the TaskControl app as the applicable employee's Mech/Insp Stamp. For more information, refer to the Task Card Tab, via TaskControl Detail in the TaskControl Training Manual.
Select the "INSPSTAMP" Transaction Code in the Document Type field for the Inspector Stamp image being uploaded to appear in the Task Card Print.
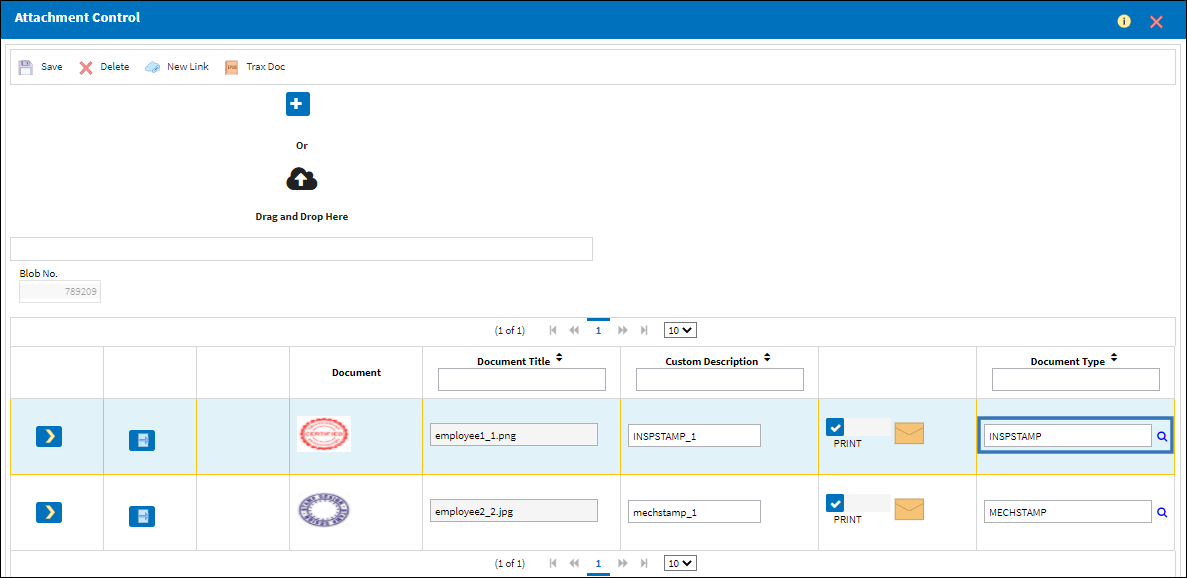
Select the "MECHSTAMP" Transaction Code in the Document Type field for the Mechanic Stamp image being uploaded to appear in the Task Card Print.
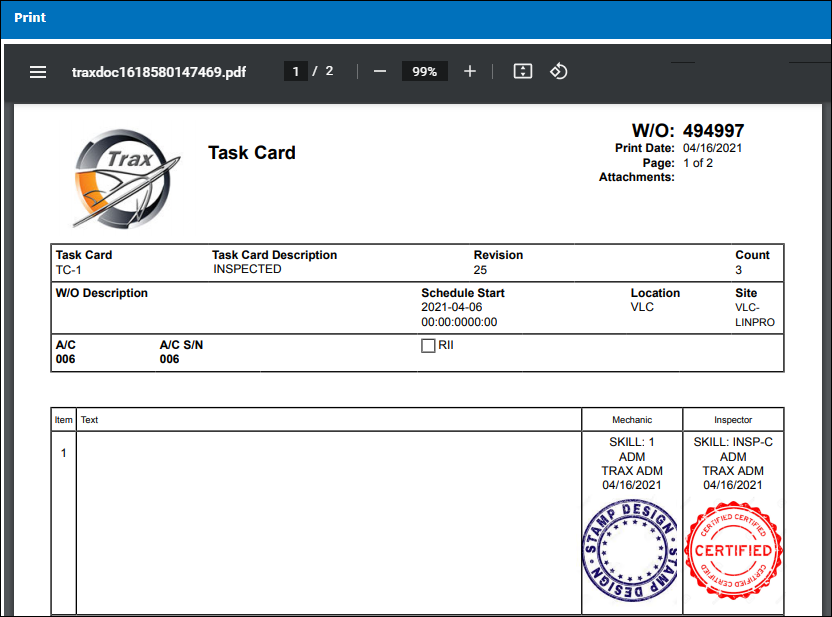
As shown below the Inspector and Mechanic Stamps appear on the Task Card Print for the completed Task Card.
Share
Print
|
©1997-2024 Trax USA Corp. All rights reserved. This manual may not be copied, photocopied, reproduced, translated, or converted to any electronic or machine-readable form, in whole or in part, without prior written approval from Trax USA Corp. |
|