
 Share
Share
 Print
Print
|
|
|
|
|
Preparing File for Import
Preparing a file for import involves populating an excel file with all the data to be imported into the system (mandatory and optional columns). Since each import loads different data into the system, these step must be performed for each of the import buttons.
The steps to build an import file are standard throughout the system. Below, the Import Parts and Tools for a Work Order Task Card is used to demonstrate.
Step 1: Export the Import File Template
Select the Import ![]() button from the applicable window and the Import From File pop up appears. Select the Excel
button from the applicable window and the Import From File pop up appears. Select the Excel ![]() button and an excel file, specific to this import, is downloaded in your browser.
button and an excel file, specific to this import, is downloaded in your browser.

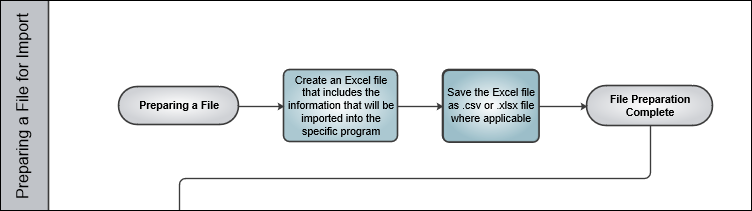
Step 2: Create the Excel File
Open the downloaded excel file and ensure the columns match the Import From File window. Populate the excel file with the data to be imported.
Note: With some import files, not all data may be imported into the system.

Step 3: Save the File
Import files for eMRO should be saved as .csv (comma delimited) or .xlsx and cannot have spaces in the title of the file. Spaces in the file path will cause errors when importing.
Note: At the time of import, if the data in the file is not entered correctly (incorrect or incomplete data populated, mandatory data is missing, format is incorrect) the program will not load the data and the system will generate warnings or exceptions.
Note: Import files saved in .xls format are not supported in eMRO.
Step 4: Import the File
Once the import excel file ready, the data can be imported into the system. Refer to Importing a File for information how to import the file.
Share
Print
|
©1997-2024 Trax USA Corp. All rights reserved. This manual may not be copied, photocopied, reproduced, translated, or converted to any electronic or machine-readable form, in whole or in part, without prior written approval from Trax USA Corp. |
|