
 Share
Share
 Print
Print
|
|
|
|
|
Non-Inventory Requisition Authorization
The following steps illustrate the authorization process for a non-inventory requisition.
Go to Requisition/ Update/ Requisition and create a non-inventory requisition that has not been quoted:
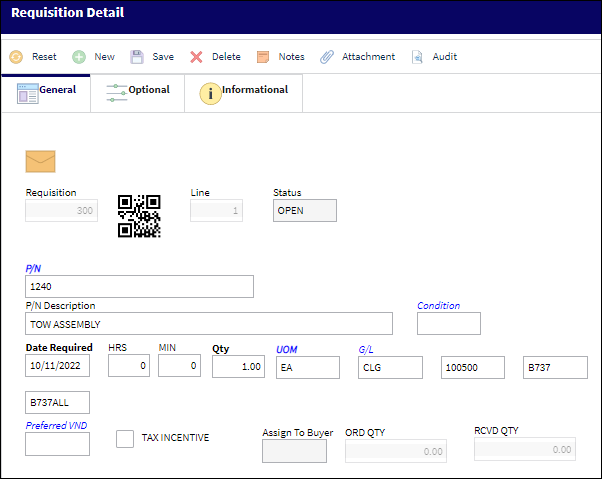
The following information/options are available in this window:
_____________________________________________________________________________________
P/N
The Part Number reference for the aircraft part.
P/N Description
The description of the part.
Condition
The condition of the part.
Date Required
The date that the item(s) is/are required by.
Qty
The quantity of items/parts required.
UOM
The Unit of Measurement for the part(s) required.
G/L
The General Ledger account, typically the Inventory Expense Account, that is affected by this transaction.
Preferred VND
The preferred vendor to acquire the parts from (if applicable).
_____________________________________________________________________________________
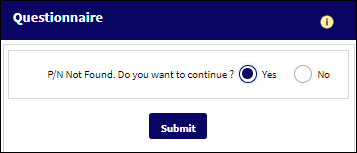
If the part number is not in the Vendor Master, then the system displays the following warning message:
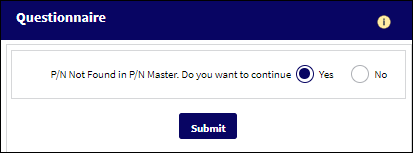
Note: When the Switch ![]() REQATHNIV is set to YES, the system will not allow a requisition to be authorized that contains at least one line of a Part that is a non-inventory item and that has not been quoted.
REQATHNIV is set to YES, the system will not allow a requisition to be authorized that contains at least one line of a Part that is a non-inventory item and that has not been quoted.
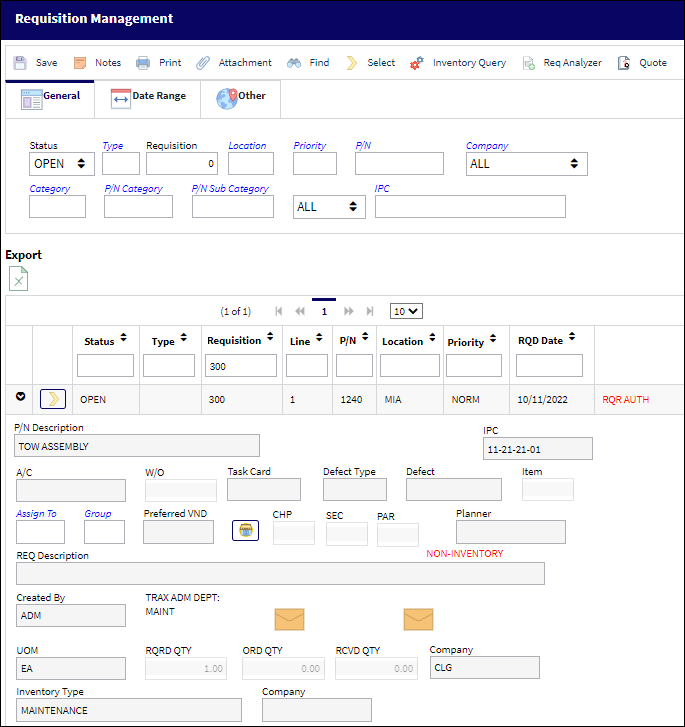
Go to Requisition/ Update/ Requisition Management and create a quote. Locate the requisition, as displayed below:
When the record is located click on the Quote ![]() button and the system displays the Request for Quote window:
button and the system displays the Request for Quote window:

Click on the Save ![]() button. You will receive the following warning:
button. You will receive the following warning:
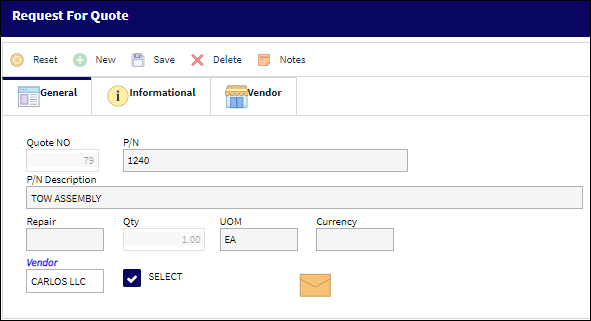
When you click on the New button, you must enter the vendor information:
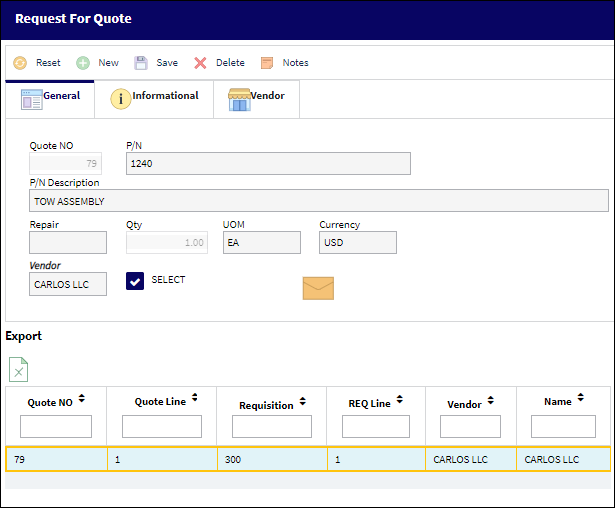
Click on the Save ![]() button to save all information. The system sends the quote to the vendor, depending upon the notification set-up to inform the vendor (from within the system).
button to save all information. The system sends the quote to the vendor, depending upon the notification set-up to inform the vendor (from within the system).
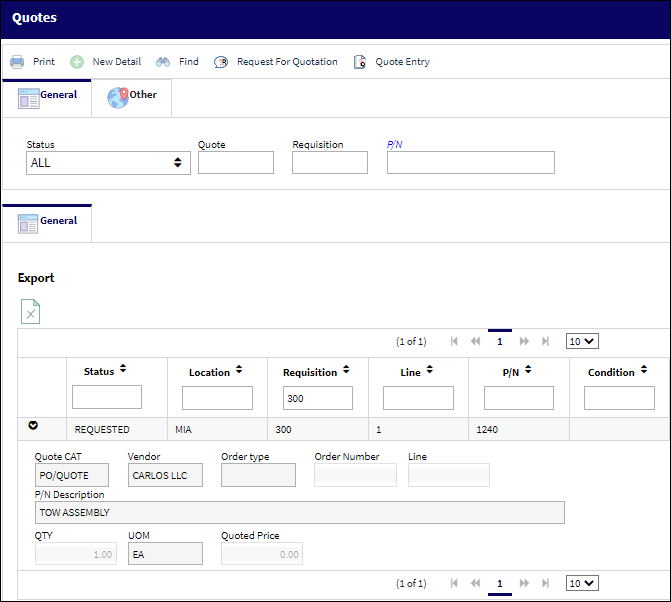
The following screen will be displayed:
Confirm that the information is correct, and then click on the Save ![]() button to save all information.
button to save all information.
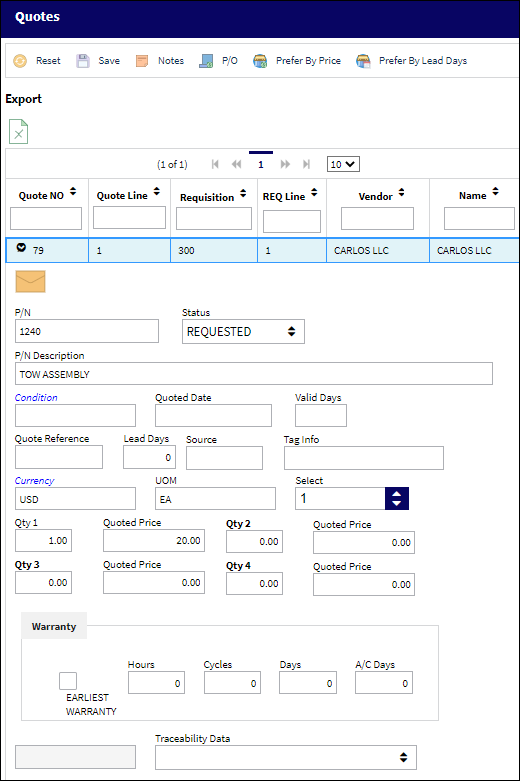
Once the vendor provides the buyer a quote, the buyer will enter the quote as follows:
Select the record and then update the relevant information (e.g. quantity and quoted prices). Then click on the Save ![]() button to save all information:
button to save all information:
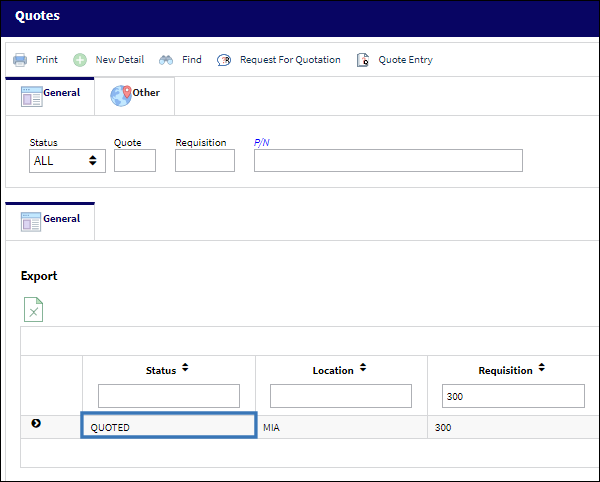
Click OK to save the record. Now the status of the requisition has changed to 'quoted'.' Once the quote is received and the status is quoted, the system allows the authorizer to approve the non-inventory requisition for purchase:
Share
Print
|
©1997-2024 Trax USA Corp. All rights reserved. This manual may not be copied, photocopied, reproduced, translated, or converted to any electronic or machine-readable form, in whole or in part, without prior written approval from Trax USA Corp. |
|