
 Share
Share
 Print
Print
|
|
|
|
|
![]()
The A/C Modification Plan window allows users to view, create, and edit A/C Modification Plan details. Each Plan consists of five sections: Drawings, Kits, A/C Design Change Notices, Parts, Manufacture Parts. The information entered in the Plan will assist the planning and maintenance teams as they perform their duties in the Production Control and Task Control applications.
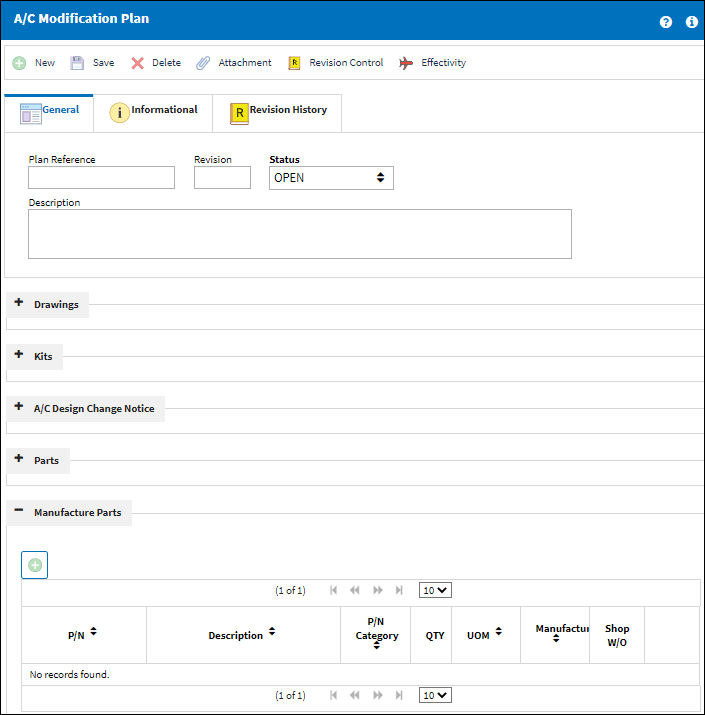
The following information/options are available in this window:
_____________________________________________________________________________________
Plan Reference
The Plan's designation, as assigned by the company.
Revision
The current revision of the Plan.
Status drop down
The current Status of the Plan (e.g., Open, Released, Closed).
Description
The description of the Plan.
New ![]() button
button
Select the New ![]() button to create a new record under the desired section.
button to create a new record under the desired section.
Attachment ![]() button
button
Select the Attachment ![]() button for each record created to link an image, document, or web link URL to the record. For more information, refer to the Attachment button via the System Standards training manual.
button for each record created to link an image, document, or web link URL to the record. For more information, refer to the Attachment button via the System Standards training manual.
Delete Record ![]() button
button
Delete the selected line item entry.
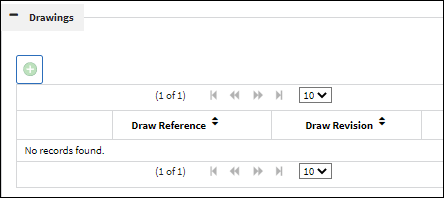
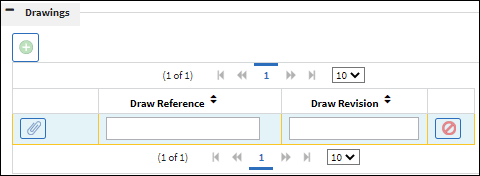
Drawings section
Used to reference drawings and images to assist in the completion of the task.
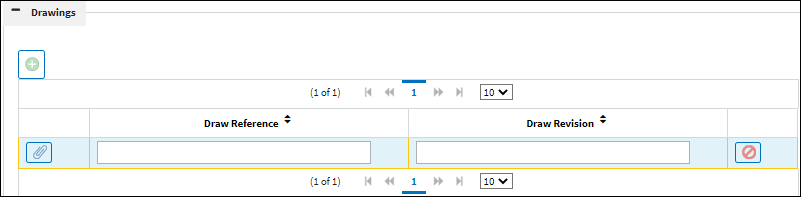
Draw Reference - The image or drawing reference for the specific task.
Draw Revision - The current Revision of the Draw Reference.
Kits section
Used to reference kit details required to assist in the completion of the task.
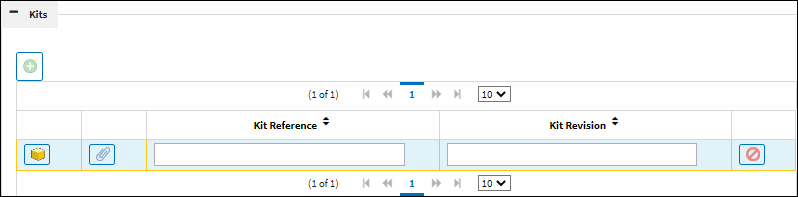
Kit Part List button - Select to populate the part list for the Kit Reference.
Kit Reference - The part list reference document for the Kit.
Kit Revision - The current Revision of the Kit Reference.
A/C Design Change Notice section
Used to reference design change notices to assist in the completion of the task.

Notice Reference - The A/C Design Change Reference document for the specific task.
Notice Revision - The current Revision of the Notice Reference.
Parts section
Used to reference part requirements that will assist in the completion of the task.

P/N - The Part Number reference for the aircraft part.
Description - The description of the part.
P/N Category - The category of the part as defined in Settings/ Explorer/ System Transaction Code Explorer/ Settings/ P/N Category (e.g. Rotable, Consumable, Repairable) and entered for the particular part in the P/N Master.
QTY - The quantity of items/parts required.
Reserve radio button - Select this option to reserve the spare or tool when W/O P/N reservation is applied. When a Picklist Reservation is made via a Work Order, only parts that have the Reserve radio button checked will be reserved. For more information regarding picklist creation, please go to Production/ Update/ Work Order/ Picklist button.
Repair Return radio button - Select this option to repair/return the spare when W/O P/N reservation is applied. This option is used if the currently installed part will be removed and repaired (via Shop or Repair Order) then reinstalled on the same aircraft to satisfy the Task Card's requirement. This is informational. When a Picklist Repair/Return is made via a Work Order, only parts that have the Repair/Return radio button checked will be repaired or returned.
None radio button - Select this option if no spare or tool will be reserved (picklisted) or repaired.
Customer Provided radio button - This option indicates that the customer will provide the required part. When selected, a picklist will only be created for parts in inventory that are owned by the same customer of the third party W/O. If the part is not available in inventory for that Owner, then a picklist will not be created nor will a Requisition be created - there will be no further action in the system as it will be up to the customer to provide the part.
Note: When the Plan is added to a Task Card or the W/O Task Card or W/O Non-Routine Task Card window via the A/C Modification Plan button, the listed P/Ns in the Plan will populate the Task Card's Material section.
Note: When the Task Card is attached to a W/O, only parts with a Loan Category 'Manage' and identified with the Owner code of the customer that is linked to the third party W/O will be reserved.
Note: If a P/N required will be supplied by both the company and the customer, multiple rows need to be set up; one row will have the Reserve radio button selected (telling the system to reserve parts that belong to the Company entered in the W/O header), and the other row will have the Customer Provided radio button selected (telling the system to reserve parts with a Loan Category 'Manage' and identified with the Owner code of the customer that is linked to the third party W/O).
Spares button - Select to view part availability for the applicable Part Number from the P/N Inventory Summary window.
Requisition button - Select to create a Requisition for the applicable Part Number. For more information, refer to Requisition, via the Requisition Training Manual.
Manufacture Parts section
Used to create Shop Work Orders for Part Numbers needed to assist in the completion of the task.

P/N - The Part Number reference for the aircraft part.
Description - The description of the part.
P/N Category - The category of the part as defined in Settings/ Explorer/ System Transaction Code Explorer/ Settings/ P/N Category (e.g. Rotable, Consumable, Repairable) and entered for the particular part in the P/N Master.
QTY - The quantity of items/parts required.
UOM - The unit of measure. This will default if associated with a Part Number as defined in the P/N Master. Transactions for parts can be conducted in a different UOM than defined in the P/N Master. However, upon receiving the UOM, conversion will automatically adjust the quantities, providing that the conversion rate is defined in the UOM System Transaction Code (via Setting/Explorer/System Transaction Code).
Manufacturer - The Manufacturer or main Vendor for this part. The Vendor must be flagged in the Vendor Master as a Manufacturer to populate this Manufacturer field.
Shop W/O - The Shop Work Order reference number.
Create Shop W/O button - Select to create a Shop Work Order for a Part Number. For more information, refer to Shop W/O, via the Shop Training Manual.
_____________________________________________________________________________________
Add a record
Under the desired section, select the New ![]() button.
button.
Populate the sections related Reference and Revision fields and then select the Attachment ![]() button to link an image, document, or web link URL. For more information, refer to the Attachment button via the System Standards training manual.
button to link an image, document, or web link URL. For more information, refer to the Attachment button via the System Standards training manual.
Once all information has been added to the record, select the Save ![]() button to save.
button to save.
Multiple records can be created for each section, or a section can be left empty. Repeat the steps above to add another record.
Share
Print
|
©1997-2024 Trax USA Corp. All rights reserved. This manual may not be copied, photocopied, reproduced, translated, or converted to any electronic or machine-readable form, in whole or in part, without prior written approval from Trax USA Corp. |
|