
 Share
Share
 Print
Print
|
|
|
|
|
JasperReports - Modifying Existing Reports
The system allows users to modify the format of all existing reports. In order to modify an existing report on the Report server, the user will have to login to a separate server that has Jaspersoft installed. This Jaspersoft server is connected to the Report server which is used to generate reports that are requested from eMRO.
The overall structure of the report must remain the same; there are limitations on the modifications that can be made to an existing report, refer to section 2.2 Modify the print details in Jaspersoft below for complete details. Even with the limitations, users will still be able to use the search fields at the top of the eMRO print window to search for specific data.
For information how to create and upload new reports, refer to the Jasper Studio help documentation and Custom Report Upload.
Note: After a new eMRO compile is run (e.g., system upgrade), any modified reports must be re-imported into eMRO. For this reason, customers should retain all modified reports .jasper file.
1. Access Jaspersoft Studio
To access Jaspersoft Studio, the application must be downloaded and configured locally. Follow the steps outlined in Connecting to Jaspersoft Studio.
Note: SaaS eMRO users must have a VPN to connect the Jasper Studio app to the database on AWS.
2. Modify Existing Report
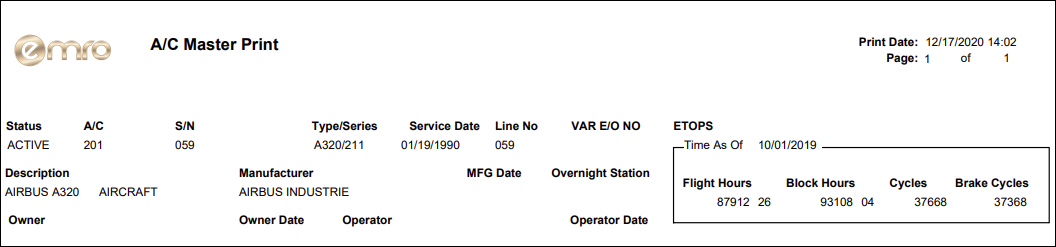
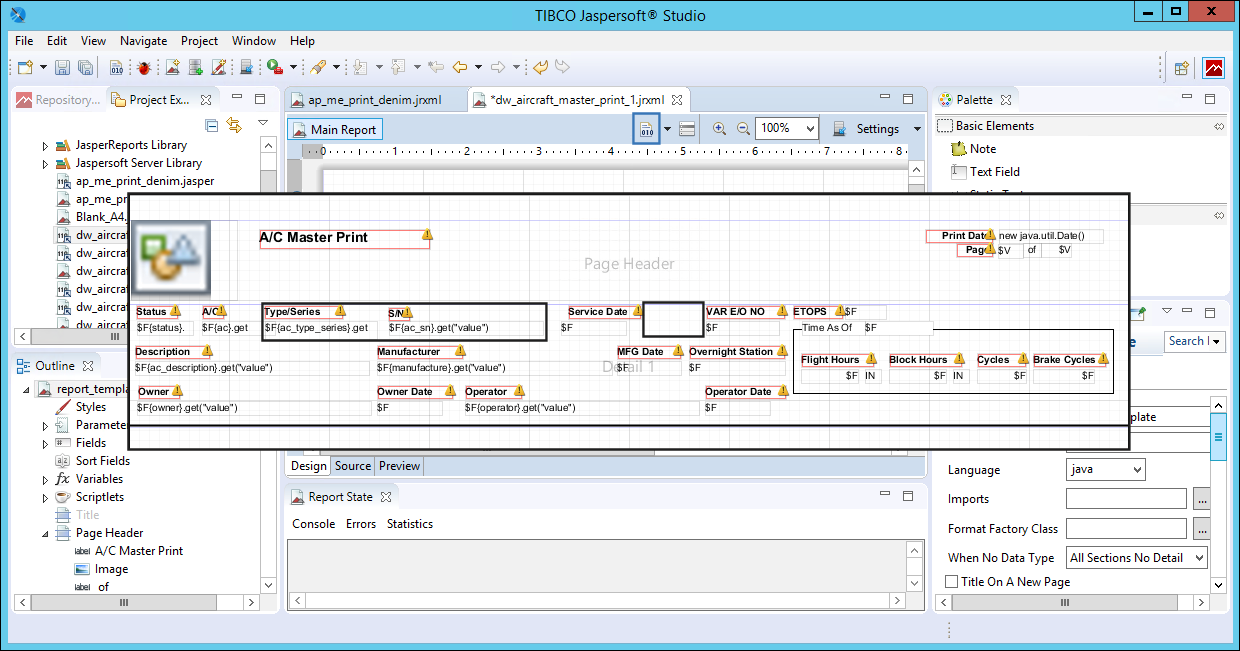
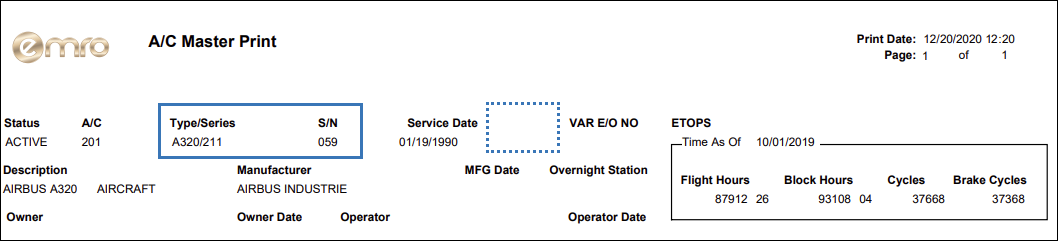
Before modifying an existing report, the original report will be shown so that the modification can be better illustrated.
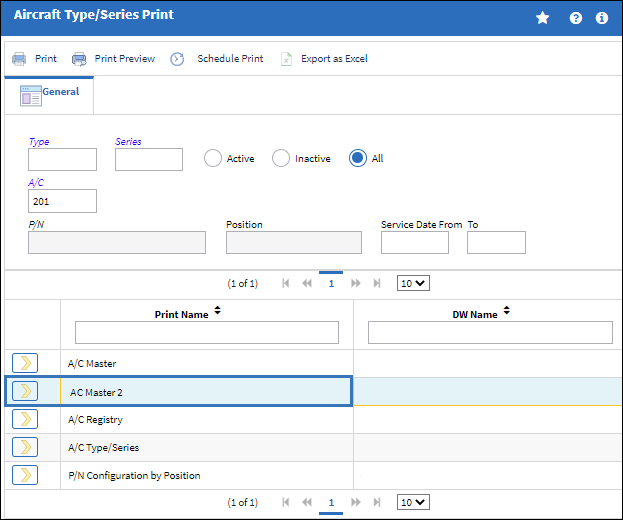
From Settings/ Print/ Aircraft Type/Series Print, the A/C Master print is generated for A/C 201.
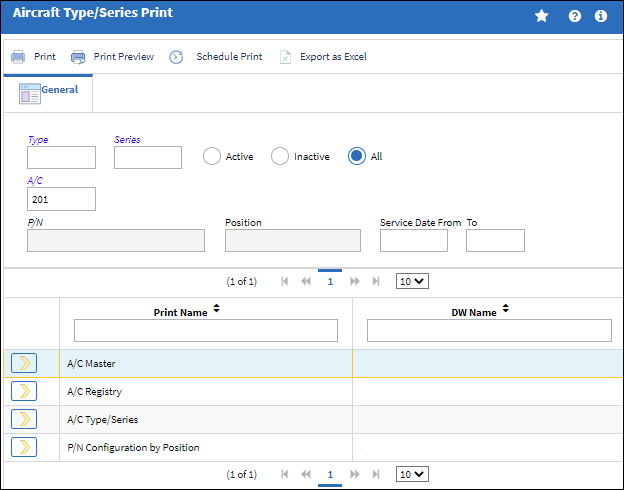
The print is available in the Print Queue and is shown below.
Follow the steps below to modify the report:
- download the original reports .jrxlm file from eMRO
- modify the print details in Jaspersoft
- upload the modified reports .jasper file into eMRO
- grant user security to the modified report
- generate the modified report and compare with the original
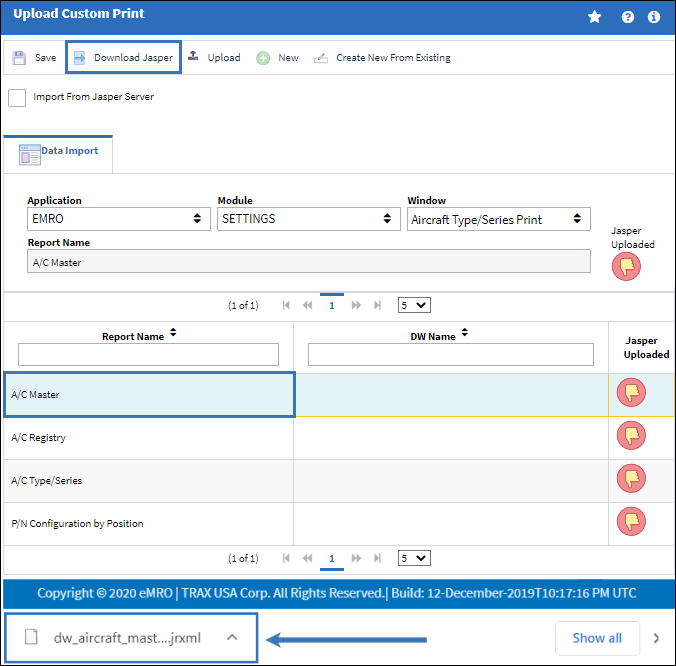
2.1 Download the original reports .jrxlm file from eMRO
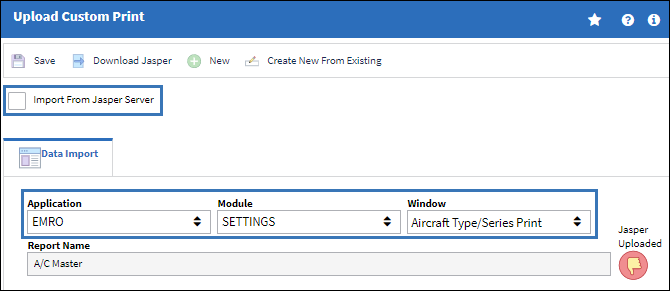
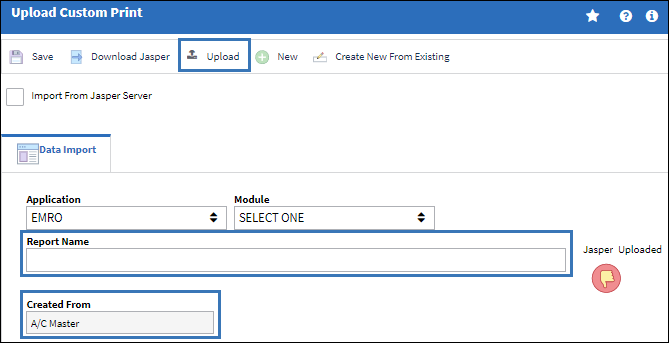
Go to Settings/ Update/ Upload Custom Print and select the Import From Jasper Server checkbox.
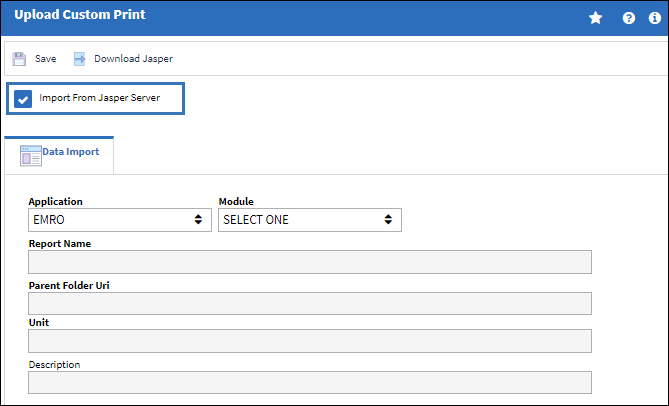
Use the Application, Module, and Window drop down to identify the existing reports location and then select the report to be modified.
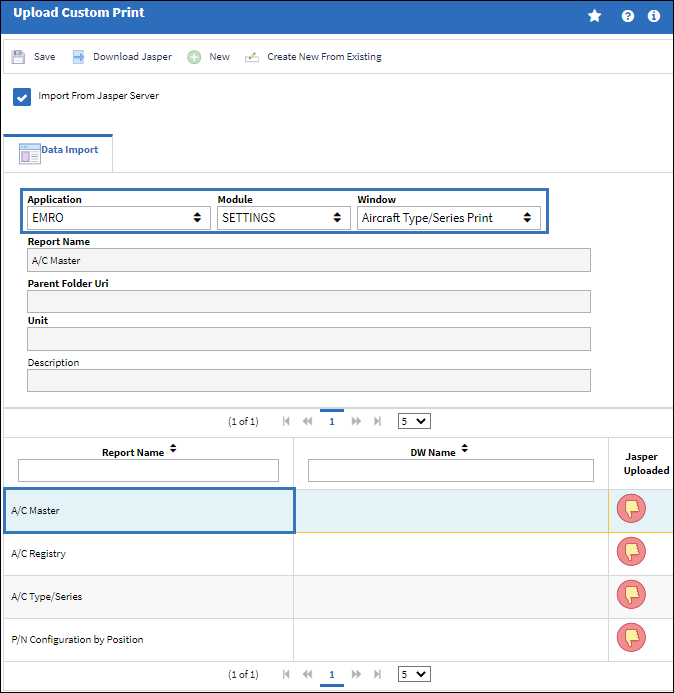
Once the desired report is highlighted, select the Download Jasper ![]() button and the reports .jrxml file will automatically download to the users' computer. Save the file in the Report Server drive.
button and the reports .jrxml file will automatically download to the users' computer. Save the file in the Report Server drive.
2.2 Modify the print details in Jaspersoft
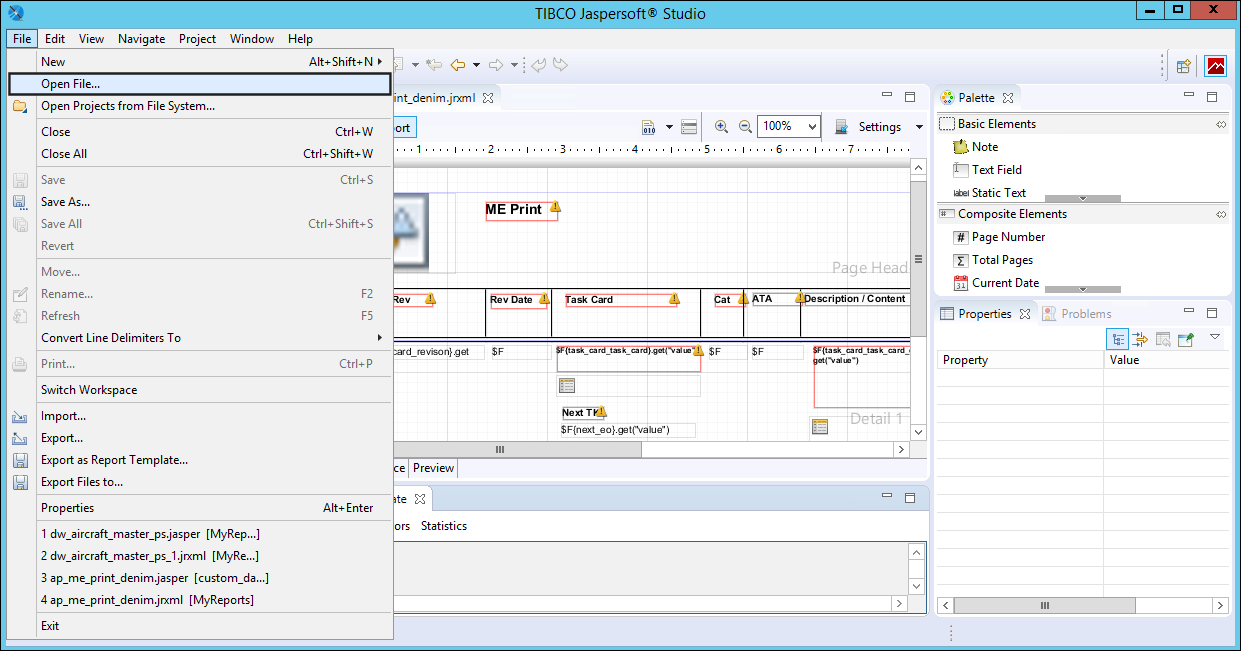
Launch Jaspersoft Studio and go to File/ Open File.
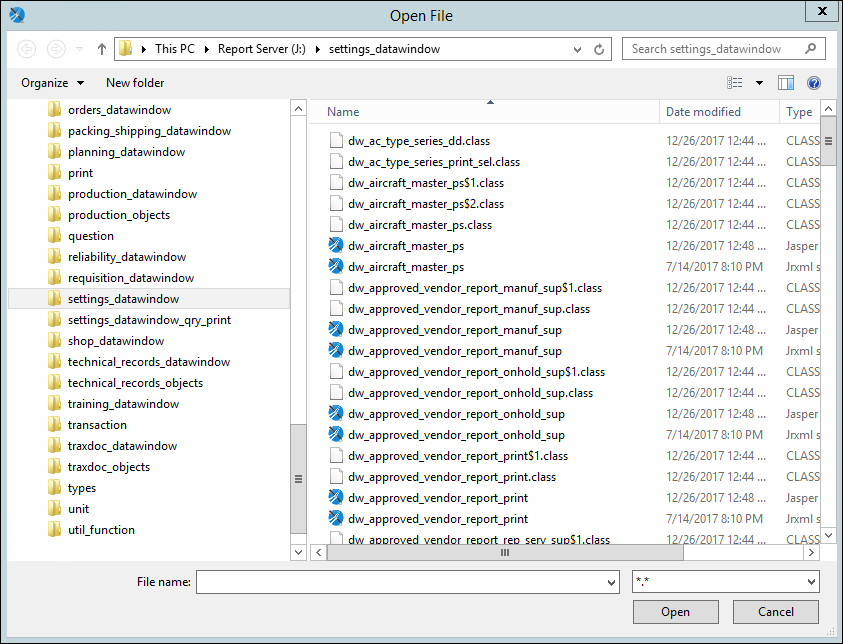
Navigate to the Report Server drive and find the downloaded reports .jrxlm file to be modified and select the Open button.
The user may change the format of the report in the following ways:
- remove/delete fields
- relocate fields
- merge existing fields
- modify titles/descriptions
- edit formulas within existing columns
The user cannot add new fields or columns from the database; in this case a new report will need to be created. For information how to create reports, refer to the Jasper Studio help documentation.
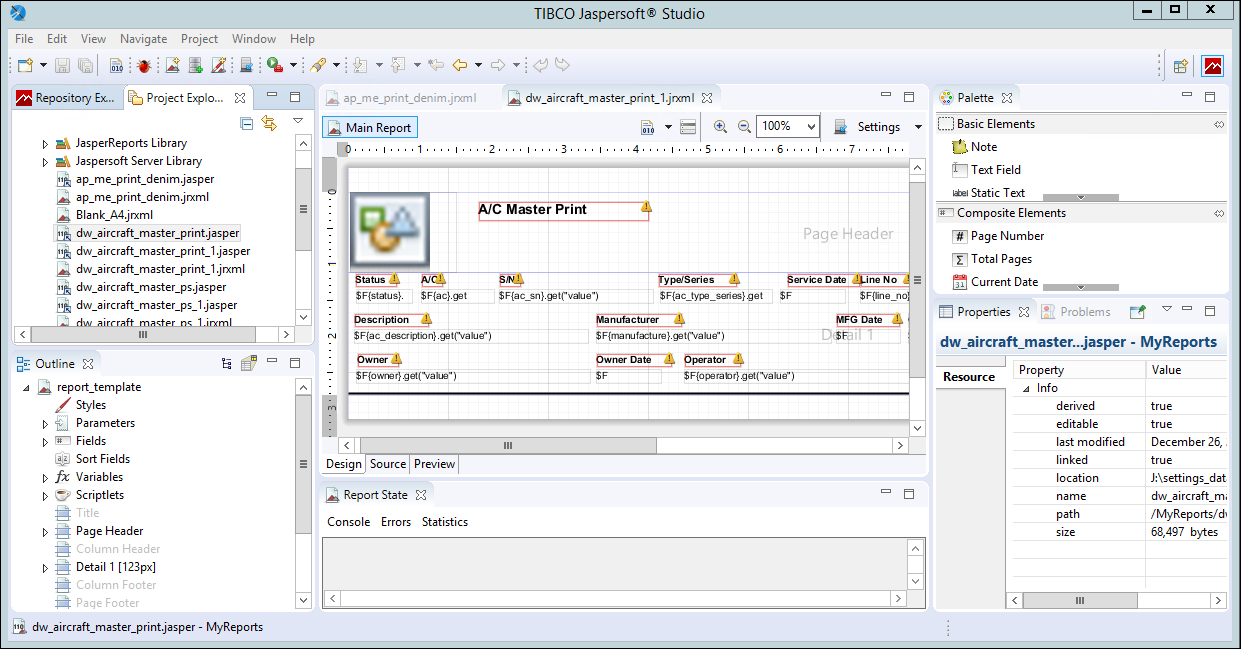
In this example, the Type/Series and S/N fields have been interchanged and the Line No field has been removed.
Once all modifications are complete, save as a .jasper file with a new file name.
Select the Compile Report ![]() button. Once the compile begins, information regarding the status of the compile will appear as shown below.
button. Once the compile begins, information regarding the status of the compile will appear as shown below.
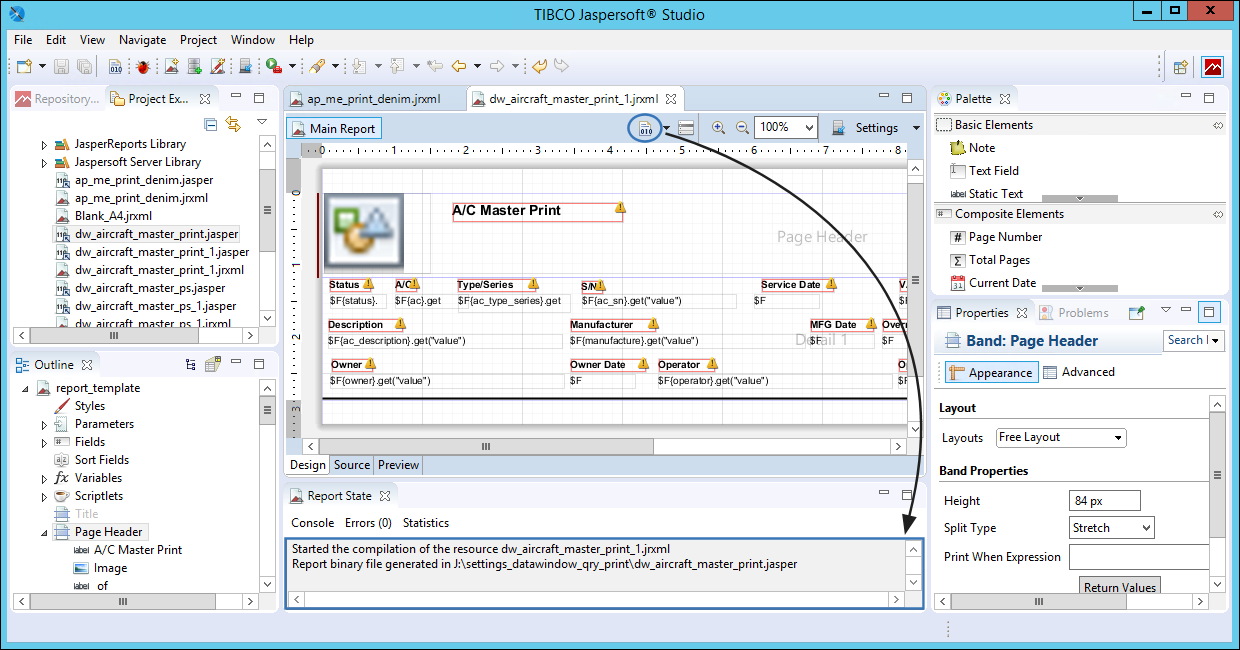
Once the file has been compiled it is ready to be uploaded to eMRO.
2.3 Upload the modified print .jasper file into eMRO
Navigate to Settings/ Update/ Upload Custom Print.
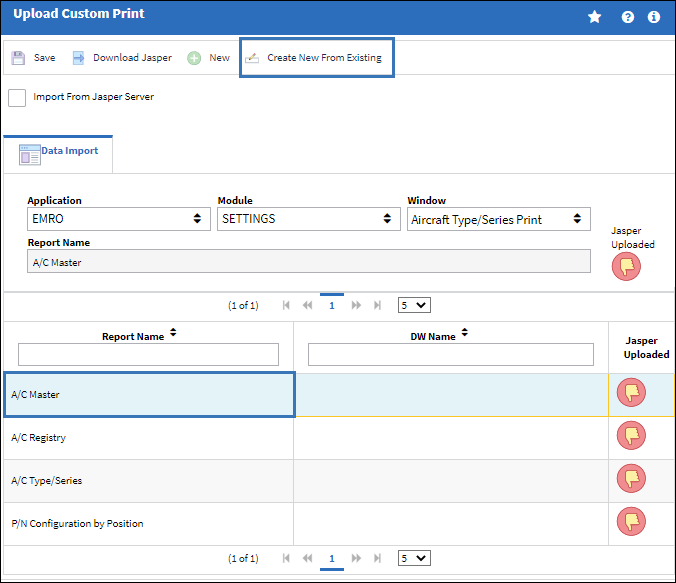
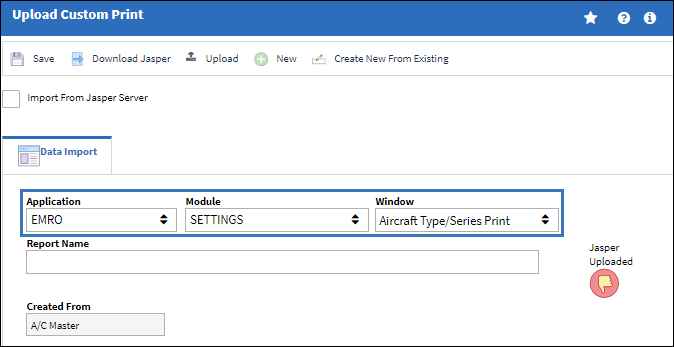
Leave the Import From Jasper Server checkbox unselected and use the Application, Module, and Window drop down to select the original reports location.
Highlight the original report and then select the Create New From Existing ![]() button.
button.
Notice the Upload Custom Print window now includes an Upload ![]() button, the Report Name field can be edited, and a Created From field shows the original report name.
button, the Report Name field can be edited, and a Created From field shows the original report name.
Use the Application, Module, and Window drop down to choose the location the modified report is to be uploaded.
Select the Upload ![]() button and the Upload pop up appears.
button and the Upload pop up appears.
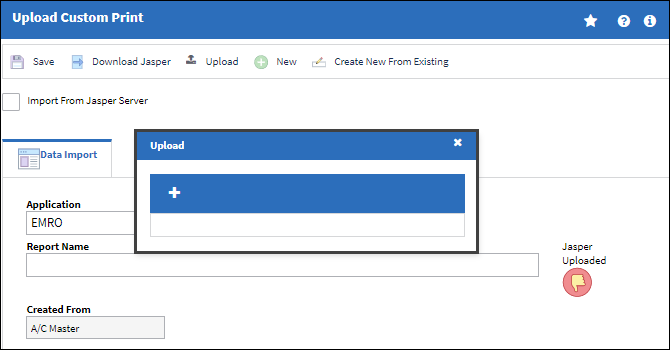
Select the Add ![]() button and from the explorer window navigate to the .jasper file to be imported and select the Open button.
button and from the explorer window navigate to the .jasper file to be imported and select the Open button.

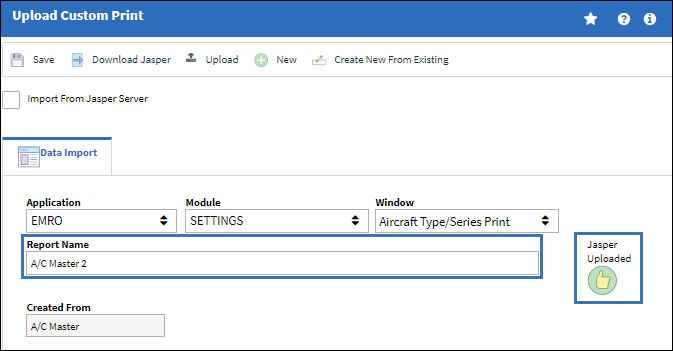
The Jasper Uploaded button turns green upon a successful upload. Enter a name for the report in the Report Name field and then select the Save ![]() button.
button.
The modified report now appears along with the other reports.

2.4 Grant user security to the modified report
Once the modified report has been added to eMRO, security must be granted to the users for to allow them to see and generate the report.
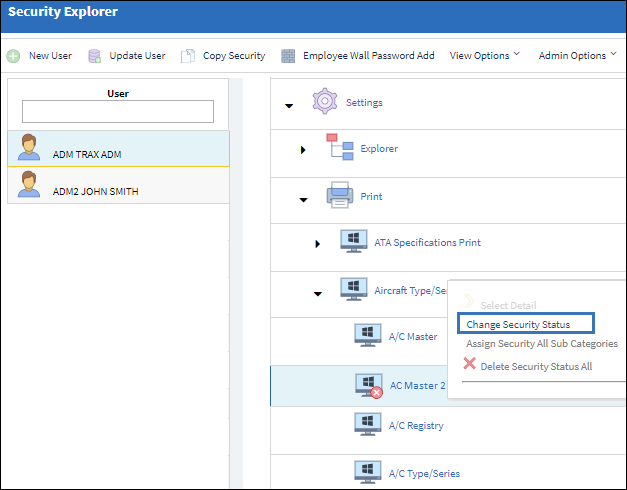
From System Administrator/ Explorer/ Security Explorer, navigate to the module window the report was uploaded. Select on the report and then select Change Security Status to grant access to the user.
The user now has access to the report in the Aircraft Type/Series Print window.
2.5 Generate the modified print and compare with the original
From the Aircraft Type/Series Print window, generate the report and then go to the Print Queue to view it.
Notice that in the modified report, the Type/Series and S/N fields have switched places and the Line No field has been removed.
Original Report:
Modified Report:
Share
Print
|
©1997-2024 Trax USA Corp. All rights reserved. This manual may not be copied, photocopied, reproduced, translated, or converted to any electronic or machine-readable form, in whole or in part, without prior written approval from Trax USA Corp. |
|